
Migrating to O365 with a Minimal Hybrid Solution
Whenever someone mentions the term hybrid, the Exchange administrator immediately thinks of a full-hybrid solution that connects an on-prem exchange environment with O365. However, while a full hybrid solution is the correct choice for companies that expect a long-term (or even permanent) coexistence between on-prem and O365, there is another option for those who are simply trying to get to the cloud instead.
Enter the Minimal Hybrid solution.
Also known as an express migration, the minimal hybrid option in the Exchange Hybrid Configuration Wizard is a great choice if you simply need to migrate the contents of your user mailboxes to Office 365 over a course of a few days or weeks. A Minimal Hybrid solution is simpler to setup and generally provides an easier path to O365 and allows the company to leverage the following benefits:
- Outlook Profiles don’t need to be recreated once the migration is completed
- Mailbox moves to O365 are largely transparent to users
- Mail flow is not affected during migrations
- User accounts and passwords are synced so no need to remember two sets of credentials
While there is a slew of benefits to using a minimal hybrid solution to get to O365, there are a few drawbacks as well:
- No Cross-premises Free/Busy sharing
- No TLS secured mail flow between on-premises and Exchange Online
- No Cross-premises eDiscovery
- No Automatic Outlook on the web and ActiveSync redirection for migrated users
- No Automatic Retention for Archive Mailboxes
There are certainly a few potential show-stoppers in that list above. However, they are generally not much of an issue for a smaller to medium sized company that's interested in making a quick move to O365. As such, as long as you aren't expecting a long period of coexistence between on-prem and O365, the drawbacks are really no longer drawbacks - but you do need to properly plan to ensure you don't wind up in a situation where you are stuck with a minimal hybrid solution during a months-long period of coexistence.
Deploying a Minimal Hybrid Solution - Overview
Deploying a minimal hybrid solution is fairly straightforward.
Assuming you have a functioning (and healthy) on-prem exchange environment, you'd start by adding and verifying your email domains in O365. Once that's been completed, the hybrid config wizard is run to make the connection between the on-prem environment and O365.
With the connection between the two environments established, you would then deploy Azure AD Connect to sync your users to O65, where you would then license them. Once licensed, you would migrate their on-prem mailbox data to O365 using the familiar Exchange ECP (assuming Exchange 2013/2016 is your on-prem solutions).
After you've moved all of your mailboxes to O365, you'd flip your DNS so that autodiscover and MX records point to O365.
Is a Minimal Hybrid Solution Right for Me?
Practically speaking, you would only want to use a minimal hybrid solution to migrate emails if you are running exchange 2010 or greater on premises. Your plan to move your users to O365 should not span more than a few weeks at most (mostly due to the limitations on free/busy sharing and such). As far as directory synchronization goes, your plan should be to get away from it once the migration is complete. In other words, a minimal hybrid solution is really only intended to get you from an on-prem solution to a cloud-only solution. It's not meant for long-term coexistence nor is it intended for those looking to manage their users on-prem.
If you are a small to medium sized organization with fewer than a couple hundred mailboxes and you want to get to O365 with minimal effort and minimal headache, a minimal hybrid solution is probably your best bet. Just be aware that your user accounts in O365 will become “cloud-only” accounts when the migration is complete, meaning you will be managing them in O365, not in local AD.
In my experience, many (maybe most) smallish organizations are looking to do exactly this. However, as always, make sure you perform your due diligence before settling on a solution – especially if there is potential for a longer, drawn-out coexistence period. My recently-published course, entitled How to Perform an Express Migration from Exchange to O365, provides over TWO HOURS of step by step instruction on deploying a Minimal Hybrid solution and leveraging it to perform an Express Migration.
Have questions about the minimal hybrid solution? Contact Me.
Managing Calendar Permissions in O365 with PowerShell
Managing calendar permissions on Office 365 / Exchange Online will often require you to get your hands dirty with PowerShell. The purpose of this article is to explain how to perform typical day-to-day admin tasks involving calendar permissions, using PowerShell.
Before managing permissions, you need to connect to Exchange Online through PowerShell. Once connected, you can view existing calendar permissions, add new permissions, edit existing calendar permissions, and remove calendar permissions.
Connect to Exchange Online via PowerShell
Connecting to Exchange Online via PowerShell requires just a few commands. Follow the instructions below to connect to Exchange Online from your PowerShell prompt.
- Launch PowerShell from Workstation
- Run the Following Four Commands in Order:
- Set-ExecutionPolicy RemoteSigned -Force
- $UserCredential = Get-Credential
- $Session = New-PSSession -ConfigurationName Microsoft.Exchange -ConnectionUri https://outlook.office365.com/powershell-liveid/ -Credential $UserCredential -Authentication Basic -AllowRedirection
- Import-PSSession $Session
NOTE: Instead of running the commands above, you can also download and run this script. After downloading, save it as a .PS1 file and run it from PowerShell using the following syntax:
.\ConnectToExchangeOnline.ps1
The above script will prompt you for O365 credentials. When prompted, supply your credentials for the O365 tenant you are trying to manage.
Viewing the Current Permissions
Before setting / updating / removing permissions from an O365 calendar, it is a good idea to see what permissions currently exist on it so they can be set back to their original permissions if you make a mistake. To list the permissions on a calendar using PowerShell, run the Get-MailboxFolderPermission command in PowerShell after you have connected to Exchange Online (see instructions above).
Get-MailboxFolderPermission -Identity john@contoso.com:\Calendar
You would obviously replace john@contoso.com with the user whose calendar permissions you want to view. If you prefer, you can pipe the output to a CSV file as well by appending | Export-CSV c:\filepath\filename.csv to the command:
Get-MailboxFolderPermission -Identity john@contoso.com:\Calendar | Export-CSV c:\filepath\filename.csv
Replace filepath with the path to the file you are creating and filename with the name you want to give the CSV file.
Removing Calendar Permissions with PowerShell in O365
Removing existing permissions from a calendar in O365 with PowerShell requires just a single command (Remove-MailboxFolderPermission). To run it, make sure you have connected to Exchange Online via PowerShell and then run the command below. In the example below, we are removing John's access from Jen's calendar:
Remove-MailboxFolderPermission -Identity jen@contoso.com:\Calendar -User john@contoso.com
Adding Permissions to a Calendar with PowerShell
The Add-MailboxFolderpermission PowerShell command is used to add permissions to a calendar. You can only ADD permissions to a calendar for a user if there are not already permissions configured. If you need to UPDATE permissions that already exist, you would use the Set-MailboxFolderPermission command.
To clarify, let's use the following example:
John is a new hire at Contoso. He has not yet been given any permissions to Jen's calendar and now needs "Reviewer" access. Since he currently has no permissions to Jen's calendar, you would use the command below to add his permissions to Jen's calendar:
Add-MailboxFolderPermission -Identity jen@contoso.com:\calendar -user john@contoso.com -AccessRights Reviewer
If John already had permissions (i.e. Editor, Author, etc) to Jen's calendar, running the Add-MailboxFolderPermission command would have generated an error indicating permissions already exist. In that case, you would use the Set-MailboxFolderPermission command instead (see below).
Changing Permissions on a Calendar in O365 with PowerShell
Changing permissions that already exist on a calendar in O365 requires a different command. Instead of running the Add-MailboxFolderPermission PowerShell command, you should run the Set-MailboxFolderPermission command when you need to update pre-existing permissions.
For example, if John already has Reviewer access to Jen's calendar, you would use the command below to change the permissions to Editor:
Set-MailboxFolderPermission -Identity jen@contoso.com:\Calendar -User john@contoso.com -AccessRights Editor
If you try to run the command above, it will fail if existing permissions are not already in place.
Available Calendar Permissions
There are 10 available roles that you can set on calendars. They are:
- Owner. Allows read, create, modify and delete all items and folders. Also allows manage items permissions
- PublishingEditor. Allows read, create, modify and delete items/subfolders.
- Editor. Allows read, create, modify and delete items.
- PublishingAuthor. Allows read, create all items/subfolders. You can modify and delete only items you create.
- Author. Allows create and read items; edit and delete own items.
- NonEditingAuthor. Allows full read access and create items. You can delete only your own items.
- Reviewer. Read only.
- Contributor. Allows create items and folders.
- AvailabilityOnly. Allows read free/busy information from calendar
- LimitedDetails. Allows view of the subject and location.
- None. No permissions to access folder and files.
You may use any of the above roles when setting permissions on calendars in O365 with PowerShell.
Summary
Managing calendars in O365 with PowerShell requires familiarity with four commands. The Get-MailboxFolderPermission command is used to view existing permissions. The Remove-MailboxFolderPermission is used to remove existing permissions. Add-MailboxFolderPermission is used to add NEW permissions to a calendar and Set-MailboxFolderPermission is used to modify EXISTING permissions on the calendar.

Can’t Hide a Synced Account from O365 GAL?
A colleague came to me the other day with an interesting O365 sync issue. A customer was trying to hide a user from the O365 global address list (GAL) but it was not working. I asked if the affected account was being synchronized to O365 from on-prem via Azure AD Connect and my colleague confirmed that this was, in fact, the case.
After determining the account was being synchronized from on-prem, I asked if the customer was using an on-prem Exchange server to manage Exchange attributes. When the customer replied that they did not have an on-prem Exchange server, I told my colleague to make sure the affected account's "Hide from address lists" property box was checked and he confirmed that it was. We forced a sync to O365 and determined that the account was STILL not hidden from the GAL in O365. To verify replication was actually working as expected, we changed the Office attribute for the account and forced a manual synchronization. The change was synchronized, meaning the actual sync process was not our problem.
At this point, we looked at the Synchronization Rules Editor on the Azure AD Connect server and noticed that there was no transformation listed for the msExchHideFromAddressLists attribute. What this told us was that this user (nor any other synced user) would never be hidden from the GAL - the "hide from GAL" attribute was not synchronizing to O365. Further investigation was required.
We went back to the customer and asked if there was ever an Exchange server on premises. We suspected there was since there were Exchange attributes in AD but I wanted to hear the customer say as much. The customer confirmed that there had, in fact, been an Exchange server on-prem at one time. The fact that Exchange had once existed led to some suspicions on our end.
My colleague did a bit more research and determined that it was likely that the Active Directory schema had actually been extended with the Exchange attributes AFTER the deployment of Azure AD Connect. This would explain why sync worked but did not include the msExchHideFromAddressLists attribute, which is a default attribute that is synchronized to O365. My colleague went ahead, refreshed the directory schema in Azure AD Connect, and then force another sync.
Voila! The msExchHideFromAddressLists attribute showed up in the config and the "hide from address lists" box finally showed up checked in O365 for the affected user. Problem solved.
Essentially, the customer (who had no on-prem Exchange server) deployed Azure AD Connect and then synchronized his users to O365. Sometime after, Exchange was deployed on-prem (probably to manage Exchange attributes). Because Exchange was deployed AFTER Azure AD Connect, the Azure AD Connect did not know about the new Exchange attributes. As such, it could not synchronize them to O365. By refreshing the directory schema in Azure AD Connect, we were able to make the tool aware of the new attributes and it then began synchronizing them - allowing the affected user to be successfully hidden from the GAL in O365.
It wasn't a terribly difficult problem to solve - but interesting nonetheless!

How to Drive Revenue with Active Directory Health-Checks
 As an IT service provider, you are always looking for new ways to generate additional revenue. One fantastic way to add to your monthly bottom line is to offer free or low-cost services to your clients, which then lead to lucrative paid engagements and contracts. This strategy is no secret.
One way to implement this strategy is to offer free Active Directory health checks to your customers. Because so much relies on Active Directory, it is a vital component to almost any business enterprise - large and small. In fact, Active Directory is so critical that problems with it can actually bring production to a grinding halt.
Knowing this, you should be making every effort to get your foot in the door with clients by offering free AD health-checks. Why? They are easy to perform, they do not require much time to complete, and they quite often lead to well-paying remediation projects.
Why Active Directory?
Almost every business process relies on active directory in some way. Whether it is a service account that runs a process or a user account that needs to login, AD is responsible for the authentication of these accounts. If a service account cannot authenticate, the business process fails. If a user cannot login, the user cannot access the business application to perform his or her job. In both instances, the business falters.
Other impacts that an unhealthy active directory can have on a business include the inability to access file shares and printers. Even network access and VPN access can be impeded. Employees are none too happy when active directory problems prevent finance from running the payroll process. Vendors are not very interested in hearing about AD problems when they are waiting on the business to pay an invoice.
Minor or major, problems associated with an unhealthy active directory will have negative impacts on any business. As such, it is a prime target for IT service providers who are looking for low hanging fruit or "easy wins".
Things to Look For
As complex as active directory is, countless issues can crop up - especially in environment where AD is not regularly maintained or monitored. Common issues to look out for in any active directory environment include DNS issues, time sync issues, replication problems, group policy issues, and orphaned objects. It is not a huge list by any means but a problem in any one of those areas is likely to affect the business in a negative manner. While some problems might be more subtle than others, some problems can bring business to a complete halt. Fortunately, most issues can be identified in a routine health check before they become larger catastrophes.
The point of offering a free health check of active directory IS NOT to spend 8 hours doing a deep dive of the environment. The goal is to perform a cursory review of some basic functionality of AD, using a handful of tools to identify anything out of the ordinary. When performed correctly, a decent cursory-level health check of active directory should take no longer than 60-90 minutes, depending on the size of the ad environment. However, a properly performed cursory-level heath check is generally sufficient to uncover most common issues within the environment - common issues that you can then remediate during a paid remediation project.
When performing a heath check, you are going to want to pay special attention to six key areas:
Time Sync
If time sync is off within the AD forest, it is going to inevitably cause Kerberos issues. Since AD relies on Kerberos for authentication, out-of-sync clocks on servers and workstations is going to ultimately prevent account logons. This will cause services to stop running, prevent users from logging in, and serves/workstations from authenticating. Things can quickly get out of hand, if time sync is not working properly or if it is misconfigured (very common).
Replication
Active directory is effectively a distributed database / identity management system that is replicated across all domain controllers in the environment. Any one of thousands of issues can cause replication issues. Issues with AD replication will result in an inconsistent active directory, meaning new users and other objects will not be visible in parts of the network. Conversely, deleted objects will remain visible.
Event Logs
Event logs are the first step in the troubleshooting process. During a health check, you will want to see what the event logs look like on the domain controllers. Event IDs noted in the events themselves will often indicate, with good accuracy, what is going on in AD.
DC Diagnostics
Domain controllers need to be able to talk to one another and they need to be able to resolve records in DNS properly. Performing DC diagnostics will often uncover underlying resolution issues, authentication issues, and even some replication issues.
Group Policy
Businesses use Group Policy to control the configuration of the environment. Printer mappings, file share mappings, and even Wi-Fi connections are all controlled via group policy - and that is just the tip of the iceberg. When issues arise with group policy access or replication, user experience is negatively impacted.
Orphaned Objects
A poorly maintained active directory can very easily become cluttered with objects that no longer exist. While this isn't technically terrible when it comes to workstations and users (although a security risk), things do start breaking down in active directory when domain controllers and servers are improperly decommissioned and left orphaned in AD. As scary as it sounds, this particular issue is usually the most common of those listed.
How to Perform an Active Directory Health Check
Performing a free ad health check does not have to be difficult nor time consuming. However, the finished report must provide at least a good overview of key pieces of ad and what issues have been uncovered.
Document the Environment
Begin the health check by running the AD Topology Diagrammer tool. To do this, you will need to download it here and have Visio installed on your computer. In addition, you will need an active directory account to access the AD you are investigating. Running the diagrammer tool will produce a Visio diagram of the entire active directory. You can work from this diagram while performing your health check. The diagram is also a nice “bonus” document to provide the customer as I have found most companies DO NOT have an updated diagram of the current AD infrastructure.
Make sure the servers depicted in the generated document match those that actually exist.
Review Time Sync
In a properly configured AD environment, the only computer getting its time from an external source is the domain controller that is serving as the PDC emulator. All other domain controllers should be getting their time from the PDC emulator. Member servers and workstations, in turn, should synchronize their time from the closest domain controller. This hierarchy ensures that all machines in the active directory have synchronized times.
To confirm the time sync configuration on domain controllers, servers, and workstations, run the following command from a command prompt on each machine:
W32tm /query /configuration
While you SHOULD run the command above on all domain controllers, it is not always practical to run it on all servers and workstations. Instead, since this is a free cursory-level check, run the command on a few servers to spot-check. Do the same for workstations if you have access to them.
The only machine that should show a “type” of NTP is the PDC emulator. All other machines should show NT5DS as the time sync type. A time sync type of NTP indicates the machine is relying on a manually configured time source. A type of NT5DS indicates the machine is relying on active directory hierarchy for time sync.
If any machine other than the PDC emulator shows NTP, note this as an exception in your final report.
Review Replication Results
There are two types of replication that you need to check: SYSVOL Replication and AD Replication. Since items such as group policy, login scripts, and such are stored in SYSVOL, you need to make sure it is replicating properly. User objects, computers, and such are stored in the AD database itself so that replication also needs to be checked.
To check replication of SYSVOL, simply create an empty text file and copy it to the SYSVOL folder on one domain controller (\\servername\sysvol). After this has been done, confirm that the text file shows up in the SYSVOL folder on all other domain controllers as well. If it does not, make a note of it as an exception.
Testing replication of AD is a little more complicated – but not much. To ensure every DC is replicating with every other DC in the environment, run the follow commands to check replication on every DC:
repadmin /showrepl server1.microsoft.com
repadmin /replsummary server1.microsoft.com
The command above will display a replication summary for each domain controller and show any replication failures that have been detected. Document your findings, highlighting any failures discovered.
Review the Event Logs on Domain Controllers
As part of any active directory health check, make sure you review the Domain Services / Active Directory event logs on each domain controller for any Warning or Error events, taking care to note the Event IDs of any events that are found. It is not critical to get into details of each one yet, since this is just a health-check and not a remediation project. Just be sure to document what you found and note that each event indicates a potential AD problem.
Perform Domain Controller Diagnostics
The DCDIAG tool is an extremely easy tool to use. Simply open a command prompt on a domain controller, type DCDIAG, and press ENTER. The tool will perform a battery of diagnostics against the domain controller that it is running on and spit out a report of what it found. Generally speaking, it is very easy to identify problems in the output because DCDIAG will typically show PASSED or FAILED for each test it performs.
Run DCDIAG on every domain controller and document any issues it finds.
Confirm Group Policies are Accessible
Because group policies control AD security and user environments, it is important to confirm that all product group policies are working and accessible.
The easiest way to ensure the policies are accessible is to login to a domain controller, launch the Group Policy Management Console, and right-click each policy to view its properties. If any policy generates and access error (or any other error) when trying to view its properties, note it as an exception.
Check for Orphaned Domain Controllers
In an ideal environment, there would be ZERO orphaned users, workstations, or servers in active directory. However, in reality, you will almost always find orphaned objects in AD. That said, what you really want to be concerned about are orphaned domain controllers – since these will cause DNS problems as well as replication failures in AD.
To check for orphaned domain controllers, do the following:
- Login to a domain controller and launch the AD Sites and Services application
- Expand the servers folder on the left until all servers are exposed
- Ensure that there is an NTDS Settings leaf under each server
- Note each server that does not have an NTDS Settings leaf under it
After you have checked for orphaned DC in sites and services, launch the DNS Management console, right-click the active directory domain on the left and select “name servers”. Make sure that the only name servers listed are those that still actually exist. If you find servers listed that do not actually exist anymore, make a note of this as an exception.
Produce and Deliver the Final Report
When you have completed running all of your tests as indicated above, document your findings in a single report that you can provide to your customer. My personal suggestion is to not only include the exceptions/issues identified but also include the “positives”. If you dump the results of your diagnostic commands to a txt file when you run them, you can simply copy and paste those results into your final report or include them as an addendum to your report. Either way works.
Use whatever report template you normally use - just make sure it looks professional.
Leverage the Fear Factor
Remember, you undertook this health-check in an effort to produce a paid remediation engagement. Sugarcoating any discovered anomalies does not really help with “selling” the paid remediation project. While I am not suggesting you overstate anything, make sure that you make it clear to your customer that failing to immediately remediate the discovered issues can lead to more significant problems down the road. Your customer obviously cares at least a little bit about how things are running because he/she would not have accepted the health check in the first place if there were no concerns about the environment.
You ultimately want to install some level of fear in your customer that things can go badly if you are not engaged to remediate the issues identified.
Outsourcing the Whole Project
The purpose of this guide was to provide an outline of how to perform a high-level active directory health check, how to identify common issues, and how to present the results in a way that results in a paid remediation engagement. However, the health-check is the easy piece. Remediation can become quite complex and should be undertaken only by a qualified Active Directory specialist.
If you do not have a qualified Active Directory specialist on staff, consider outsourcing the entire project to one you trust. As a senior-level Active Directory expert, I am always available for engagements if you need assistance.
Have Questions?
Need more information or clarification? Drop me a line. My contact info is home my homepage. You are also invited to attend one of my upcoming FREE webinars. Click here to register for one of them today.
Azure Migrate in Public Preview
I was browsing the most recent list of Azure offerings in Preview and came across this gem...
Azure Migrate, in Public Preview, is an offering from Microsoft that is intended to help organizations make the move to Azure by providing guidance, insights, and tools to assist with migrating resources to the cloud.
The tool helps companies discover and assess on-premises virtual machines and servers as well as identify dependency mappings that can affect a migration to Azure. It also offers smart rightsizing for Azure virtual machines, which ensures VMs are sized correctly once in the cloud. Azure Migrate also offers reporting with guidelines for remediation of potential issues.
Workload migrations are performed via server replication, which allows for a largely seamless cutover to Azure.
This could certainly be a major catalyst to getting companies into Microsoft Azure.
Deploying Azure File Sync
In case you missed it, Microsoft has released Azure File Sync to preview. Because many companies I work with have distributed (ie. international) user bases, I figured I should check this new offering out by taking it for a test drive.
Here are my findings.
Deploying Azure File Sync
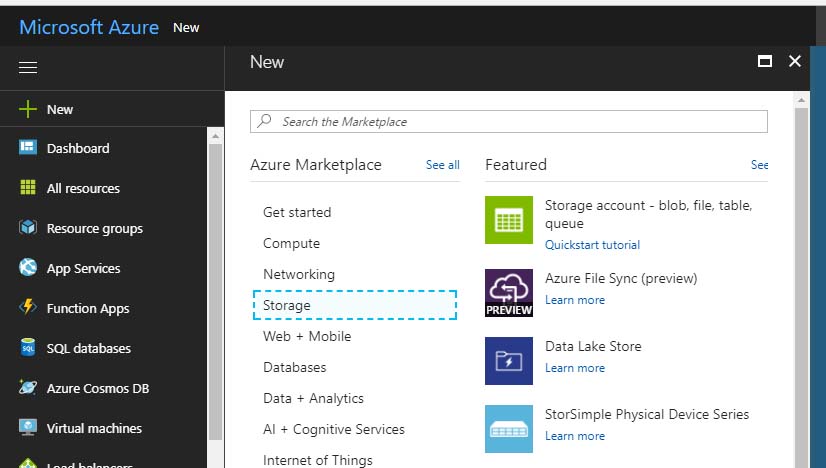
Deploying the Azure File Sync service was pretty straightforward. I just browsed the “Storage” marketplace, found Azure File Sync, and deployed it.
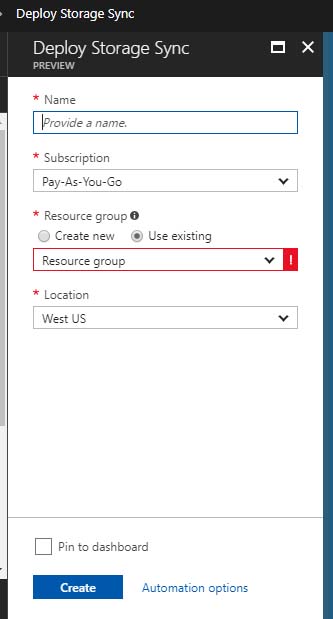
During deployment, I was prompted for the usual suspects: name, resource group, location, and subscription. Once thing I did notice during deployment was that (not surprisingly) the service is only available in a few regions. This is typical of “preview” services.
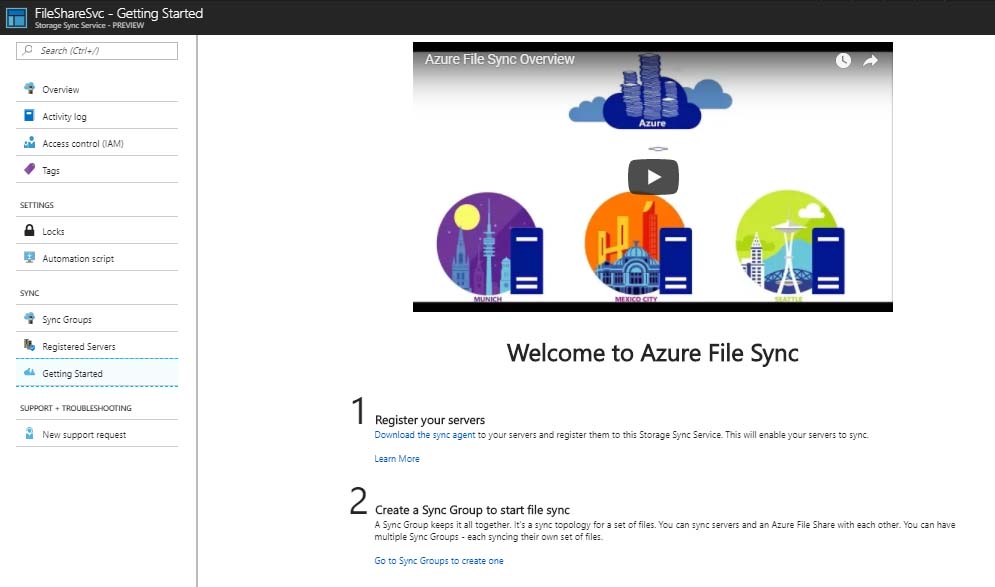
After deployment, which took less than 2 minutes, I was greeted by the welcome screen, which presented me with two steps: Registering Servers and Creating a Sync Group. Seemed simple enough.
The Azure File Sync service offering is almost certainly built on the same technology as Azure Site Recovery and Azure Backup, based on the requirement to “register” my file servers that would be replicating. The process is eerily similar to setting up ASR and Backup agents.
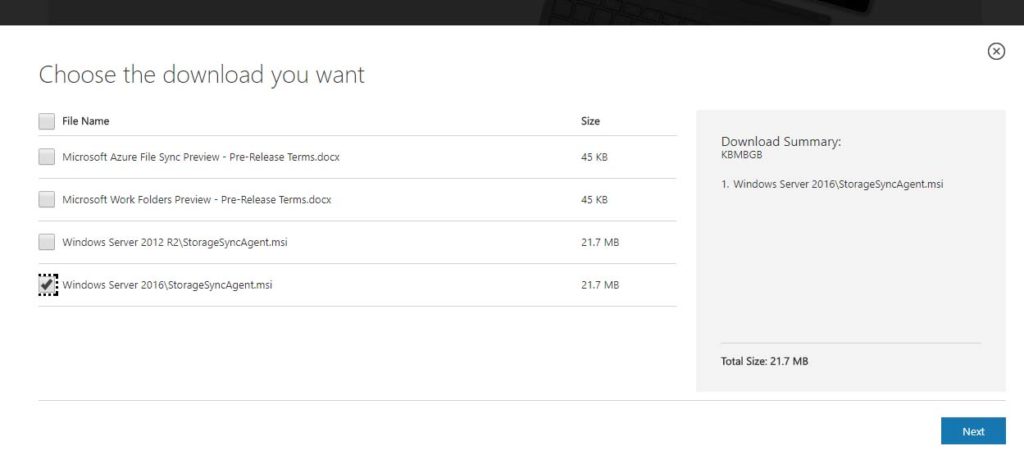
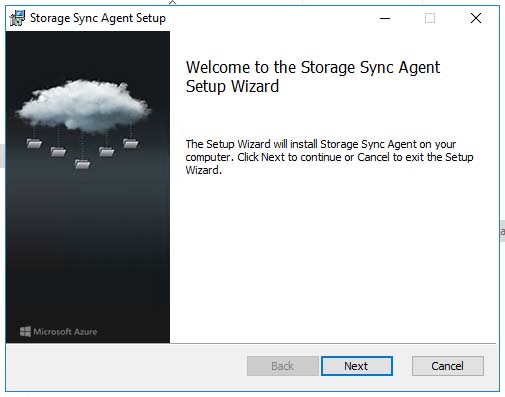
I had two file servers in my lab. FILESERVER was a Windows 2016 box on the West coast while FILESERVER2 lived on the East coast. To register them with Azure File Sync, I downloaded the sync agent and installed it on both servers.
The Storage Sync Agent installation was an easy wizard-driven process.
However, when it came time to register the servers, I was greeted with the warning below.
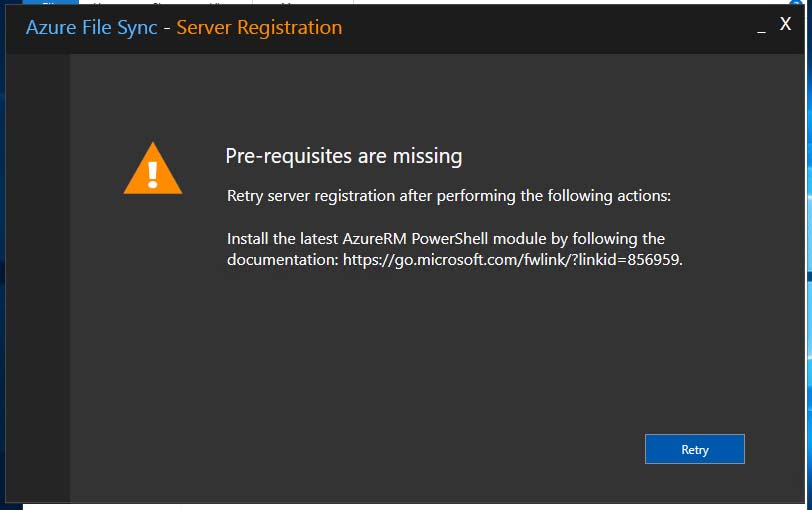
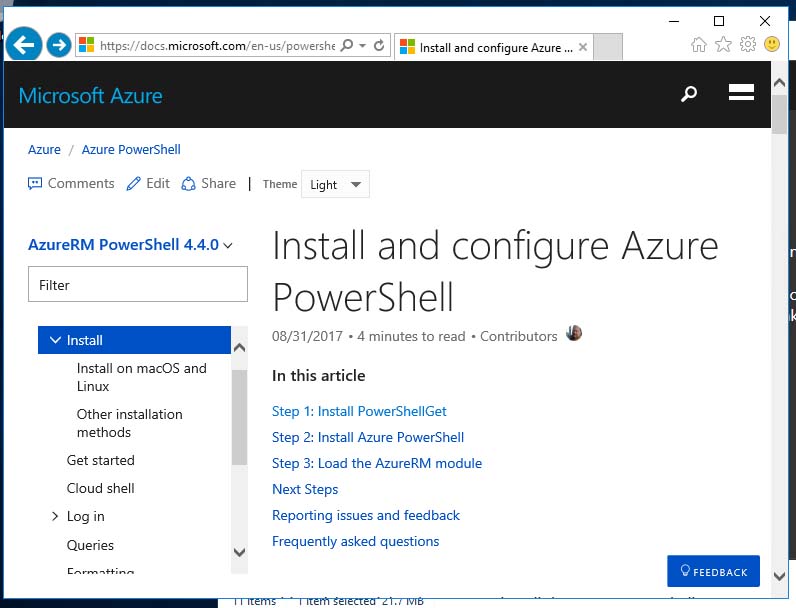
That said, it was easy enough to follow the link in the warning and to install the latest AzureRM PowerShell module on the servers. The process involved just three steps: installing PowerShellGet, installing Azure PowerShell, and loading the AzureRM module.
The process was entirely PowerShell-driven and consisted of just three PowerShell commands:

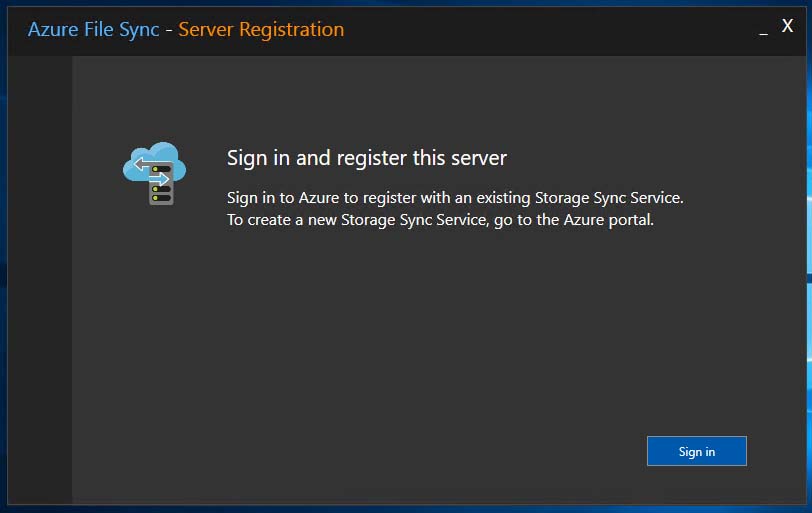
Once the PowerShell stuff was done, I was able to sign in and register my servers with my Azure File Sync service:
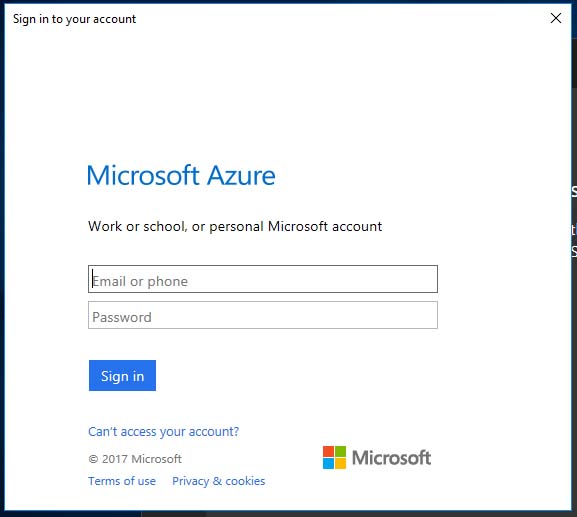
After clicking Sign In, I was prompted for my Azure admin credentials:
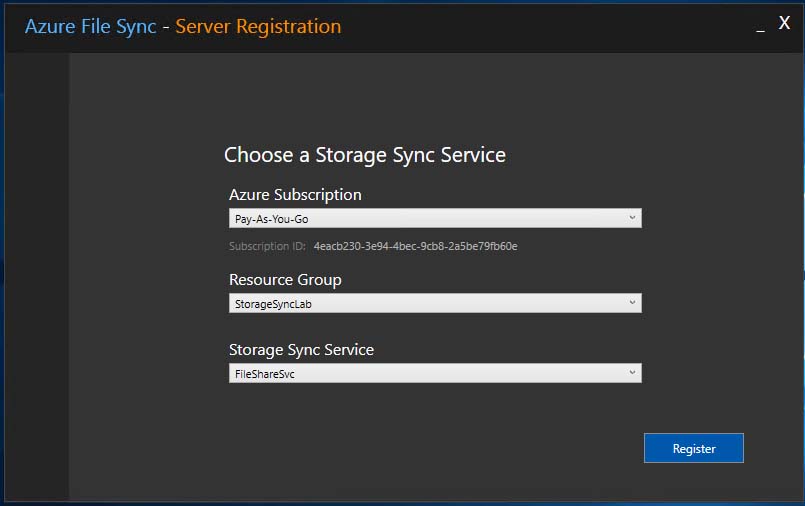
Once authenticated to Azure, I was prompted to my Azure Subscription, my Resource Group, and my Storage Sync Service that was previously provisioned.
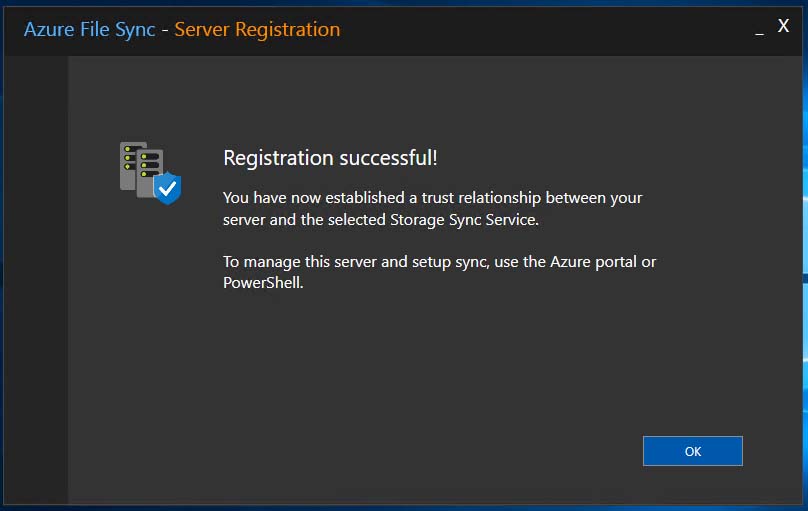
Oddly enough, clicking “Register” produces yet another prompt to authenticate to Azure using my admin credentials. I’m not sure if this was due to some “preview” bug or what; but, no big deal. I entered my credentials and signed in.
After signing in, I got the “Registration Successful” congratulations – and I clicked OK to finish up.
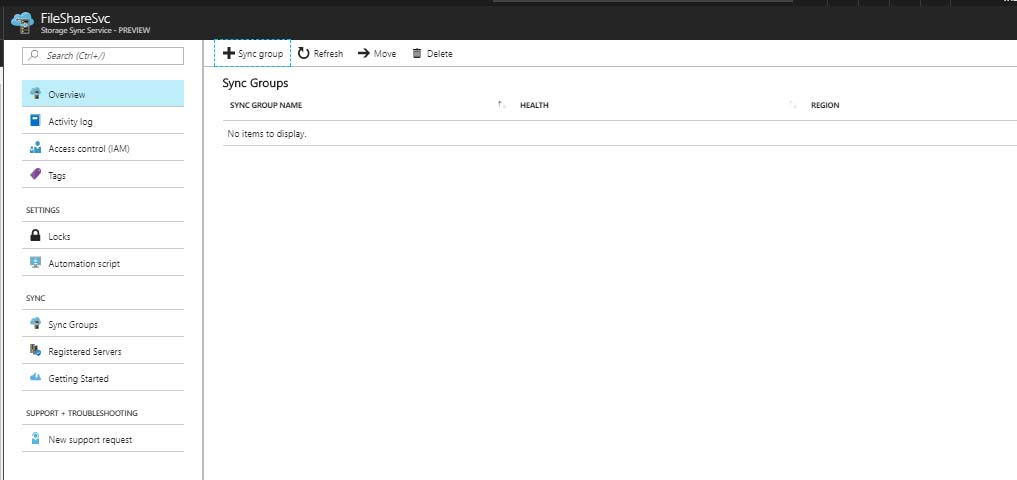
With my servers registered (I followed the above process on both of them), I switched back over to my Azure portal and clicked on my Azure File Sync service to start configuring it.
However, before doing so, I went out and created a storage account in Azure that planned to use exclusively for Azure File Sync.
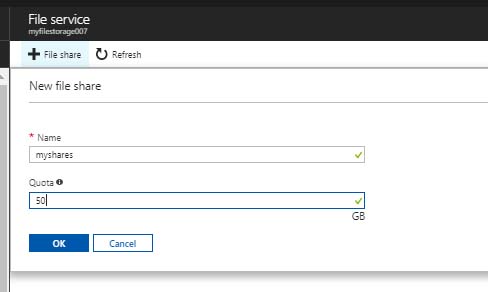
With the storage account provisioned, I created a file share in it, called “myshares” and gave it a random 50GB quota just for fun.
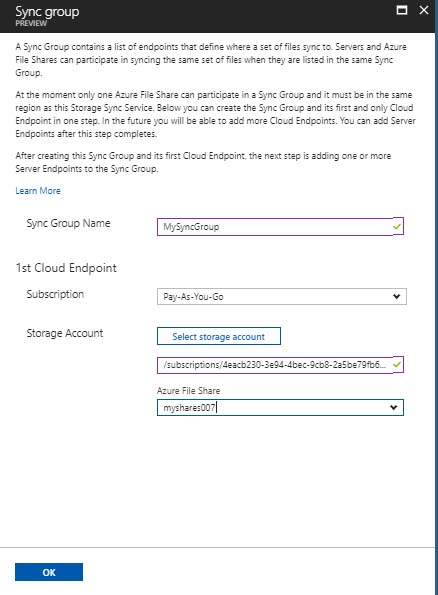
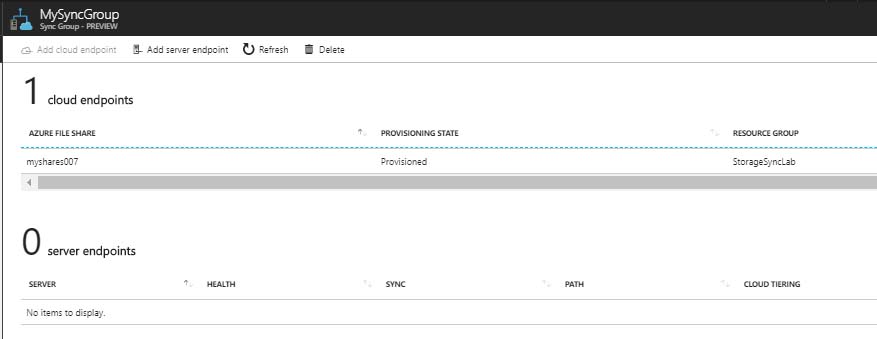
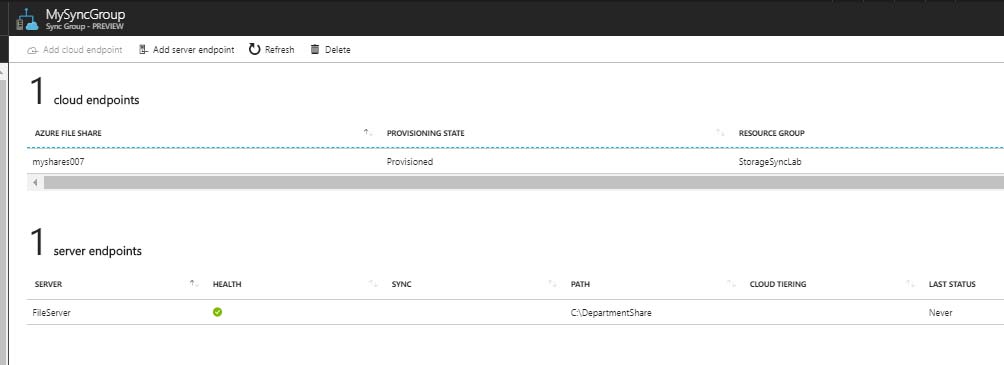
Once I had my file share configured, I switched back over to my Azure File Sync service to create the Sync Group and to setup my server endpoints. I just needed to give the sync group a name and tell it where to sync to (cloud endpoint).
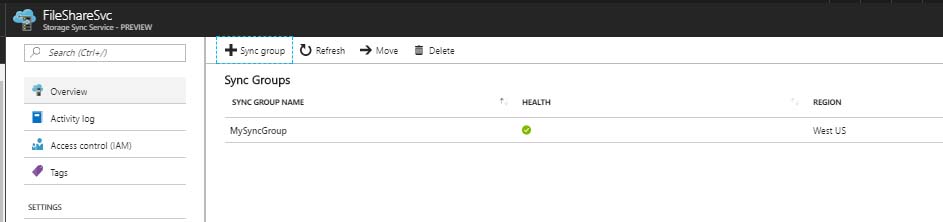
Once provisioned, I could see the sync group and cloud endpoint were both provisioned and healthy.
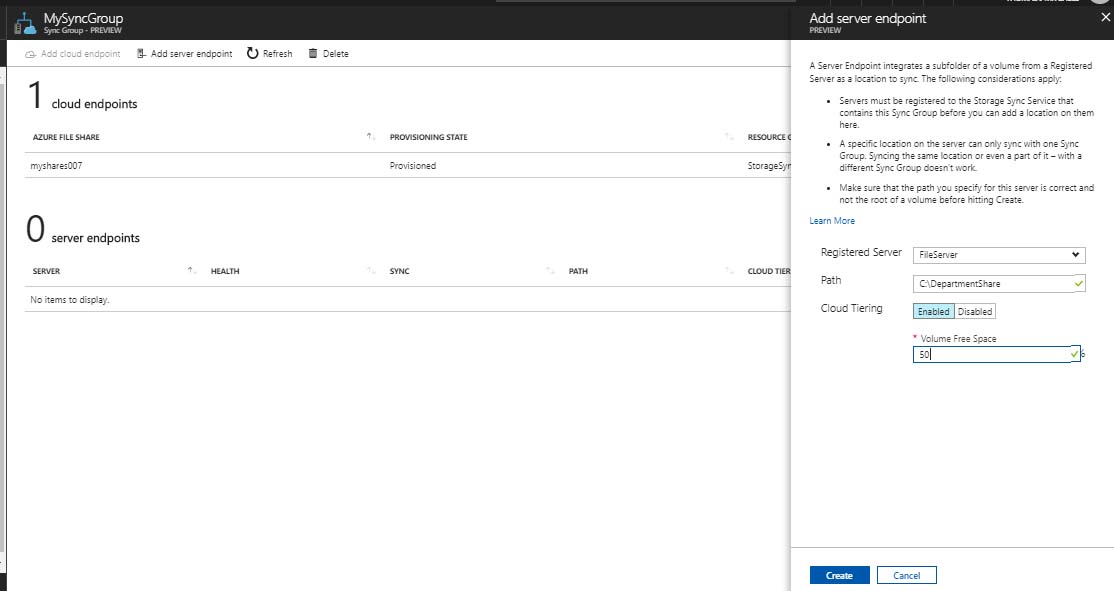
Adding server endpoints was simple. After clicking “Add Server Endpoint”, I was able to select each of my registered servers, along with the share path (which was actually a local path – no UNCs). I did this for each server (FILESERVER & FILESERVER2) and turned on cloud tiering, which is the feature that allows the most-accessed data to be accessed directly from the server while less-accessed stuff is pulled from the cloud. This is supposed to improve access times – but I haven’t done any kind of benchmarking yet to confirm that.
After deploying each server endpoint, I could see it’s status.
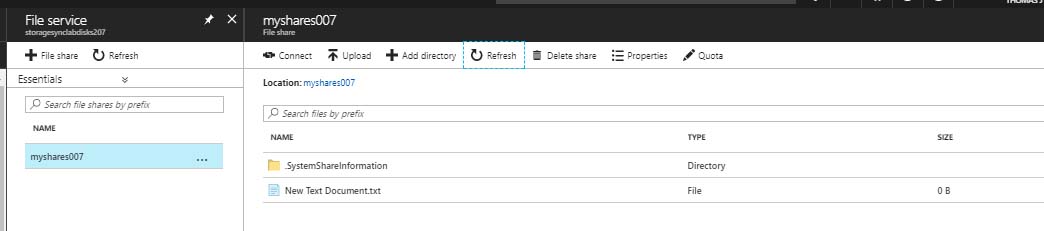
To confirm operation, I created a dummy file in my FILESERVER machine and confirmed that it had replicated to my file service in Azure.
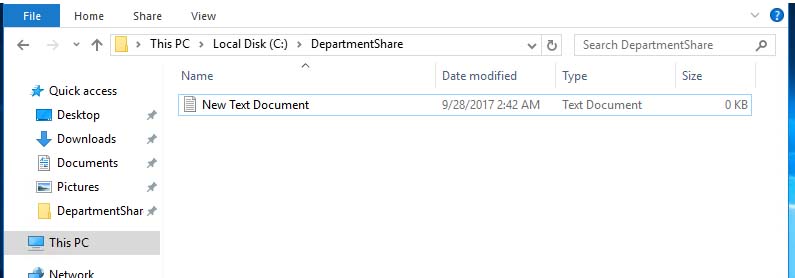
After creating the file on the server, I checked Azure File Services, and sure enough, it was there as well.
For good measure, I created a second file on FILESERVER and checked to make sure it, along with the first file, made their way to FILESERVER2.
They did:

With that, I was able to confirm that files created on my FILESEVER box were successfully synced up to my Azure file service, and from there, synced down to FILESERVER2.
What this offering buys me is the ability to provide file share access to a remote location at local-like speeds. The immediate use-case that comes to mind is a situation I’m currently facing with an existing client of mine. This client has offices in the US and in EU. Their file server resides in the US so the EU users are almost always complaining of latency issues. By implementing Azure File Sync, I may be able to mitigate most of those complaints.
Overall, the solution wasn't terribly difficult to deploy - and it appears to work rather well.
Time for a pilot….

Azure Availability Zones are Here! See What’s New.
There are 36 or so Azure Regions. Within each region, there are a few datacenters. Up until recently, the best Microsoft could offer was a choice of which region to host our workloads. We were not even given a choice of datacenter nor a choice of how replication of our workloads was handled across those datacenters.
That’s all changed now. Azure Availability Zones have just been released within the last week or so. With availability zones, Microsoft has improved the high availability and resiliency of workloads that are hosted in a single region.
Instead of having just the option of which region in which to host workloads, Azure users now have a choice of zone (i.e. datacenter) within a region when deploying those workloads. This offers more granularity than ever before.
Because each Azure Availability Zone is effectively a separate datacenter, each has its own independent power source, cooling, network infrastructure, etc. Azure Regions with Availability Zones consist of no fewer than three zones (datacenters), making it possible to achieve high availability within the region itself.
When deploying Azure Resources (i.e. VMs, disks, etc) , you will be prompted to first choose the Azure Region as usual but, now, you will also have the option to choose a specific Availability Zone as well.
At the time of writing this, the Azure Availability Zones features is newly in Public Preview. In fact, the feature is only available in the East US 2 and West Europe regions as of this writing. Additionally, Azure Availability Zones are only available, during this preview period, for a handful of resources, such as Windows Virtual Machines, Linux Virtual Machines, Zonal Virtual Machine Scale Sets, and Managed Disks. It won’t be long before the feature is available for other resources as well.
Click here to read more about Azure Availability Zones. To sign up for the Azure Availability Zones Preview and enable the feature on your Azure Subscription, visit http://aka.ms/azenroll.
How to Deploy a Virtual Machine in Azure with PowerShell
Introduction
I’m a GUI guy. When offered the choice between using a GUI to perform a task and using PowerShell, I will almost always choose the GUI. However, that does not mean I won’t or can’t use PowerShell. In fact, any Microsoft engineer worth anything should be familiar with using PowerShell. As such, I’m going to explain to you in this article how to use PowerShell to configure and deploy several Azure resources, including a Resource Group, a Storage Account, a Virtual Network, a Subnet, a Public IP address, a Network Interface, and last, but not least, a Virtual Machine.
Install Azure PowerShell
Before doing anything in Azure with PowerShell, you are going to have to install Azure PowerShell. To do so, visit this link and click on Windows Install under the PowerShell section.
Connect to Azure with PowerShell
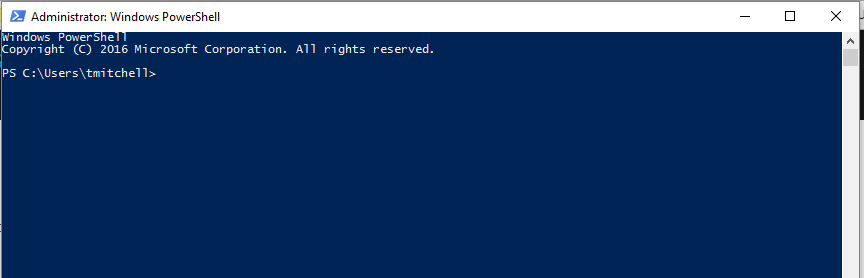
Once you’ve installed Azure PowerShell, go ahead and launch PowerShell from your workstation:
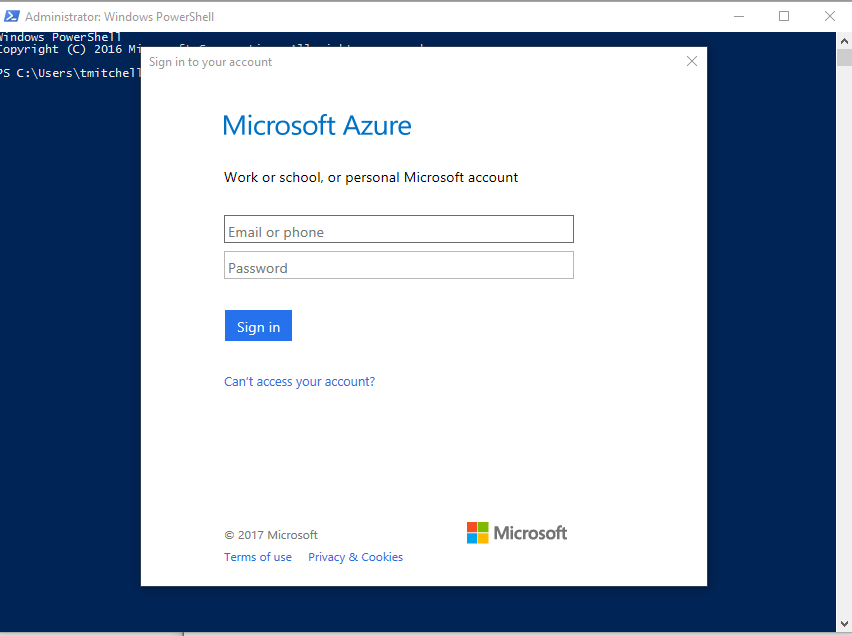
After launching PowerShell, go ahead, type Login-AzureRmAccount, and hit Enter. When prompted for your Azure credentials supply them and click Sign In.
Once you’ve signed in, it’s time to create your resource group, which will contain all of the resources you are about to create.
Create a resource group
Before you create your resource group, you need to decide where you are going to create it and what you are going to name it. To get a list of available locations where resources can be created, type the following command in PowerShell and hit Enter:
Get-AzureRmLocation | sort Location | Select Location
After hitting Enter, you will be provided with a number of Locations to choose from.
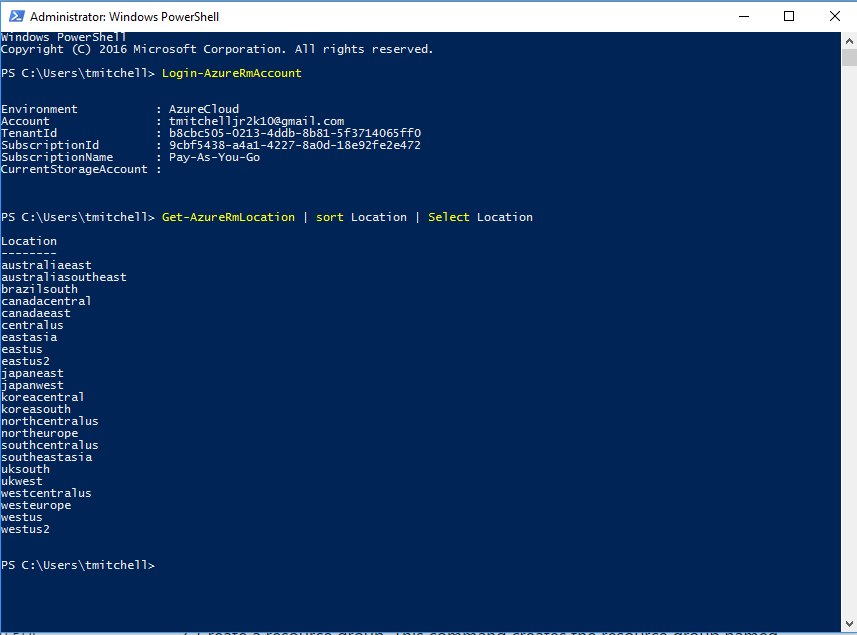
For this exercise, note the location westus as your chosen location and let’s call the resource group myAzureResourceGroup.
Now that you’ve settled on a location and name for your resource group, type the following three commands in PowerShell, hitting Enter after each one:
$location = "westus"
$myResourceGroup = "myAzureResourceGroup"
New-AzureRmResourceGroup -Name $myResourceGroup -Location $location

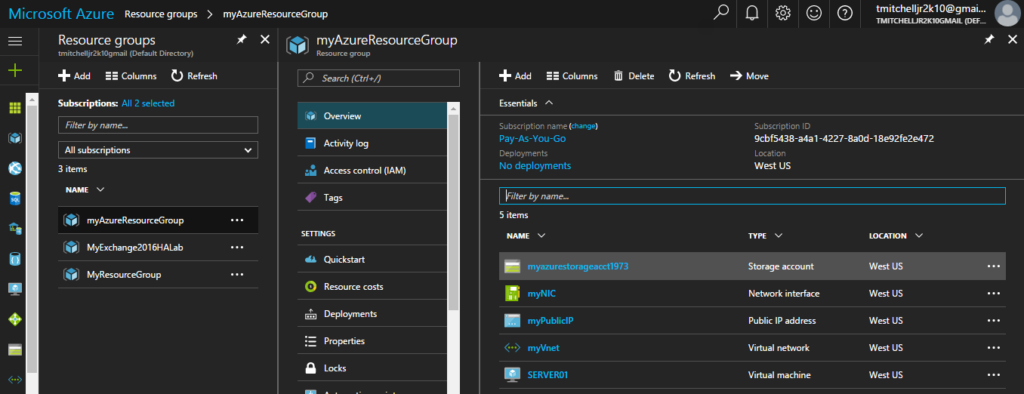
At this point, your Resource Group named myAzureResourceGroup has been provisioned in the West US location. With your resource group deployed, it’s time to create a storage account to hold your storage for your VM.
Create Storage Account
Before creating your storage account, you have to settle on a name that is unique across the entire Azure landscape. The name of your storage account must be between 3 and 24 characters and must consist only of lower case letters and numbers.
For this exercise, we will call the storage account myazurestorageacct1973.
To check the availability of the name, type the following two commands in PowerShell, hitting Enter after each one:
$myStorageAccountName = " myazurestorageacct1973"
Get-AzureRmStorageAccountNameAvailability $myStorageAccountName
If the second command returns True, the proposed name is unique within Azure and can be used.

To deploy the storage account, type the following command and hit Enter:
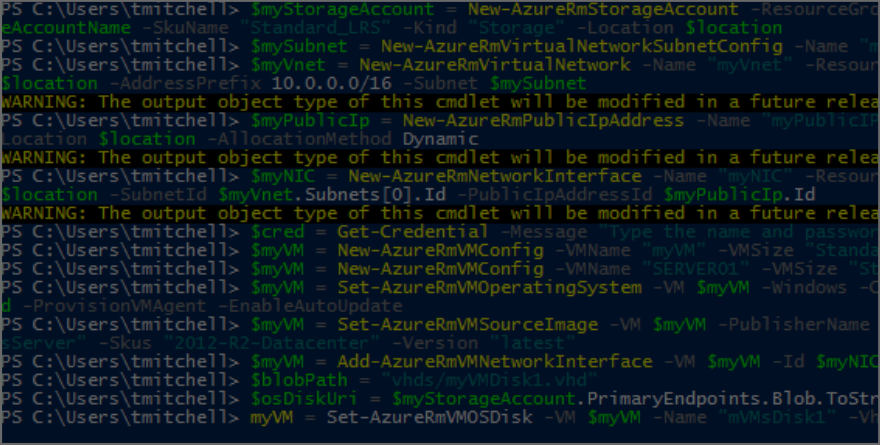
$myStorageAccount = New-AzureRmStorageAccount -ResourceGroupName $myResourceGroup -Name $myStorageAccountName -SkuName "Standard_LRS" -Kind "Storage" -Location $location
NOTE: The above command is one long line.
If everything goes as it should, you should just be taken back to the prompt in PowerShell:

Create a virtual network
Now that the resource group and storage account have been deployed, go ahead and create the virtual network that your eventual virtual machine will live on. To do this, you will have to deploy two resources: subnet and virtual network.
For this exercise, we will deploy a subnet called mySubnet with an address prefix of 10.0.0.0/24 on a 10.0.0.0/16 virtual network called myVnet.
Deploy the subnet first by running the following command in PowerShell and hitting Enter:
$mySubnet = New-AzureRmVirtualNetworkSubnetConfig -Name "mySubnet" -AddressPrefix 10.0.0.0/24
After running the command, you will be take back to the prompt.
With the subnet created, go ahead and deploy the virtual network by running the following command and hitting Enter:
$myVnet = New-AzureRmVirtualNetwork -Name "myVnet" -ResourceGroupName $myResourceGroup -Location $location -AddressPrefix 10.0.0.0/16 -Subnet $mySubnet
As was the case before, the above command is one long string. If run successfully, you will simply be taken back to the prompt in PowerShell.
By now, you’ve deployed your resource group, storage account, and virtual network with a subnet attached to it. It is now time to create a public IP address and network interface. The network interface will allow your virtual machine to connect to your virtual network while your public IP address will allow you to RDP into your virtual machine once it has been deployed.
Create a public IP address and network interface
Before provisioning your network interface, you will want to provision your public IP address. To do so, run the following command in PowerShell and hit Enter:
$myPublicIp = New-AzureRmPublicIpAddress -Name "myPublicIP" -ResourceGroupName $myResourceGroup -Location $location -AllocationMethod Dynamic
The command above is all one line and the result of it is a dynamic public IP address resource called myPublicIP. You will assign this public IP while provision your virtual network interface (named myNIC) by running the command below and hitting Enter:
$myNIC = New-AzureRmNetworkInterface -Name "myNIC" -ResourceGroupName $myResourceGroup -Location $location -SubnetId $myVnet.Subnets[0].Id -PublicIpAddressId $myPublicIp.Id
At this point, you’ve got the infrastructure prepared and you can now deploy the virtual machine.
Create a virtual machine
Virtual machines can be deployed using both sysprepped and non-sysprepped images. They can also be deployed from the Marketplace, which is what we are going to do here.
The first thing you’ll want to do is set the admin account and password for your virtual machine. To do this, run the command below and hit Enter:
$cred = Get-Credential -Message "Type the name and password of the local administrator account."
When prompted, supply an administrative username and password. The password must be at least 12 characters long and contain one upper case character, one lower case character, a number, and one special character.
Next, you’ll need to create a configuration object for the virtual machine. The configuration object includes a name for the virtual machine and a size for the virtual machine. For this exercise, we’ll name our virtual machine SERVER01 and use the “Standard_DS1_v2” size.
To complete this task, run the following command and hit Enter:
$myVM = New-AzureRmVMConfig -VMName "SERVER01" -VMSize "Standard_DS1_v2"
Click here for a list of supported server sizes in Azure.
Once you’ve completed the above task, you’ll need to configure the operating system for the virtual machine. This configuration task sets the computer name, OS type, and account credentials for the VM. To configure these settings run the following command from PowerShell:
$myVM = Set-AzureRmVMOperatingSystem -VM $myVM -Windows -ComputerName "SERVER01" -Credential $cred -ProvisionVMAgent –EnableAutoUpdate
Be sure to run the above command all on one line (no line breaks). As is the case with other commands, you’ll simply be returned to the prompt when it completes.
At this point, you can define the image you’d like to use to provision the virtual machine. Run the following command to deploy a Windows 2012 R2 Datacenter machine:
$myVM = Set-AzureRmVMSourceImage -VM $myVM -PublisherName "MicrosoftWindowsServer" -Offer "WindowsServer" -Skus "2012-R2-Datacenter" -Version "latest"
Now that the image is selected, go ahead and add the network interface that you provisioned earlier:
$myVM = Add-AzureRmVMNetworkInterface -VM $myVM -Id $myNIC.Id
Once you have the network interface added to your virtual machine, you can define the name and location of the hard disk for the VM. For this exercise, we will call our disk myVMDisk1.vhd.
To complete this task, run the following two commands, hitting Enter after each one:
$blobPath = "vhds/myVMDisk1.vhd"
$osDiskUri = $myStorageAccount.PrimaryEndpoints.Blob.ToString() + $blobPath
With the disk name and location defined, you can add the disk to your virtual machine configuration. The following command (all one line) will create a disk called myVMDisk1:
$myVM = Set-AzureRmVMOSDisk -VM $myVM -Name "mVMsDisk1" -VhdUri $osDiskUri -CreateOption fromImage
You can now create the actual virtual machine using the following command:
New-AzureRmVM -ResourceGroupName $myResourceGroup -Location $location -VM $myVM
To confirm creating of your new virtual machine, login to your Azure Portal and ensure it is listed under your resource group called myAzureResourceGroup.
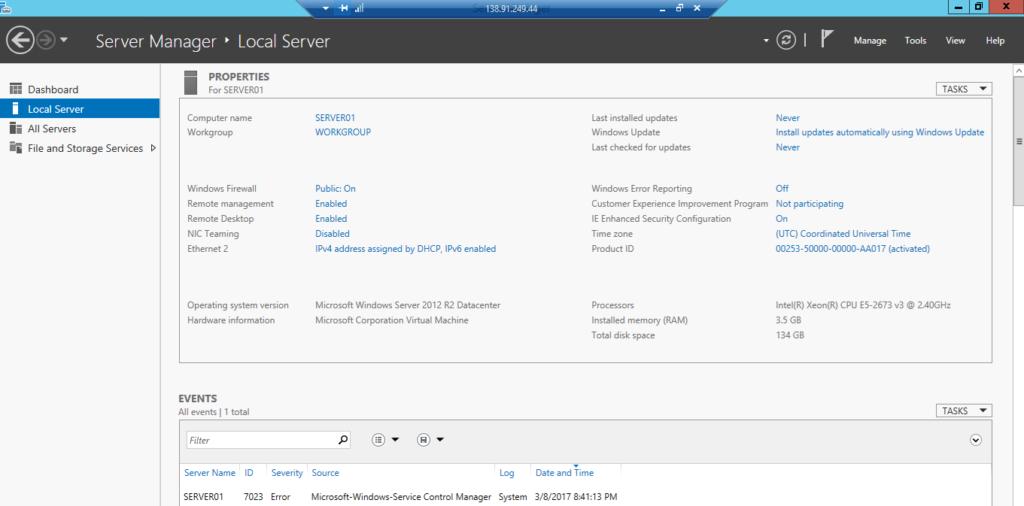
You should also be able to connect to it via RDP.

My Active Directory Domain Controller in USN Rollback!
USN Rollback? WTF is That?
So, you rolled into work this morning, got your coffee, and settled in at your desk. It’s a nice Friday morning and the weekend is looking great. Life is good. You didn’t even have to do the domain controller patching last night. Your junior admin did.
Then…
You open your email… and you find a half-dozen tickets... and they all indicate several newly-provisioned users that were created earlier this morning can’t login. You think to yourself, “no biggie – I’ll just force replication and move on”. Easy-peasy, right?
Wrong.
After forcing AD replication among your Active Directory domain controllers – several times, you realize that the new accounts refuse to show up on any other DCs except for the one that your helpdesk typically connects to when provisioning users. So, you think to yourself, “Is this how my day is going to go?”
Yes. Yes it is.
You start troubleshooting by looking at the domain controller that the helpdesk uses and find that the Netlogon service is paused. Well, that’s weird. Being the highly-skilled troubleshooter you are, you opt to NOT try and restart Netlogon and, instead, track down the event logs for more information – only to find some event ID 2013’s, 8456’s, and 8457’s floating around. Not good.
After some further research, you suspect that your domain controller is in USN Rollback mode.
WTF is USN Rollback?
USN Rollback means that your day just got complicated.
Active Directory uses USN Rollback to protect against replicating stale info throughout AD by disabling replication to/from an affected DC. For example, if you take a snapshot of a domain controller VM, patch the VM, and then roll back to the snapshot because of issues with patching, the domain controller is likely to go into USN Rollback – especially if any AD replication occurred prior to rolling back to the snapshot.
Guess what your junior admin did last night…
Your Windows 2008 R2 domain controller is now refusing to replicate to or from any other domain controllers – and any changes that have been made on the affected DC are now stuck on that DC and will not be replicated to the rest of Active Directory. Running repadmin /replsummary shows that replication is failing to/from the affected domain controller. This all explains why the new users cannot login.
To confirm your suspicions, you open Regedit on the affected DC and browse to the following path:
HKLM\System\CurrentControlSet\Services\NTDS\Parameters
While in there, you see a key that says “DSA Not Writable” with a value of “4”. Now you know, for certain, that your Active Directory domain controller is definitely in USN Rollback. So, now what? Well, fix it! You have system state backups for the DC in question, don’t you? If so, it’s time to break them out so you can just do a non-authoritative restore on the DC and re-enable replication.
Although USN Rollback isn’t terribly difficult to recover from (if you are prepared), it DOES become a bit more of a headache if:
- You are doing what lots of companies do and multi-tasking your domain controllers
- You have no good system state backups
- You have no idea what the DSRM password is (has anyone EVER actually documented this??)
- You are dealing with any combination of A, B, and C
In your case, you realize that your affected domain controller also hosts your internal Certificate Authority. Peachy! Oh, you also have no idea what the DSRM password is for the affected DC. It was never documented. Yikes.
Without the DSRM password, a non-authoritative restore is out of the question. That would have been the easiest solution. As such, you are now left with only one choice – demote the affected domain controller and then re-promote it. Your problem, however, is that you cannot demote an Active Directory domain controller if Certificate Services is installed. You have to uninstall Certificate Services first. Ugh.
Although it sounds scary on the surface, uninstalling Certificate Services isn’t too terrible, provided you aren’t doing anything crazy. Microsoft has a great document here that covers the process of moving your CA to another server, which by the way, is what I recommend in this particular case. If you have to pull Certificate Services off of your domain controller anyway in order to demote/re-promote it, you might as well move the CA to it’s own server as a course of best practice.
After migrating your Certificate Authority to a new server, it’s time to get the DC fixed.
Since you are still using an older OS (Windows 2008 R2), go ahead and launch dcpromo /forceremoval from a command prompt. You are going to have to use the /forceremoval switch because the affected DC cannot replicate out. A regular dcpromo is not going to allow you to demote the domain controller gracefully.
During the forced demotion, you are going to see a few warnings that you have to agree to. The two you are most interested in are the DNS cleanup and whether or not this is the last DC in the forest. You DO want to remove the DNS zones from this DC. However, do NOT tell it that this is the last domain controller. Bad things will happen. Once the force demotion is complete, the server will reboot and no longer be part of the domain. Shut it down.
At this point, go into Active Directory Users and Computers on a healthy DC and delete the record for your demoted DC from the Domain Controllers container. In addition, go into AD Sites and Services, expand the demoted server, and delete the NTDS Settings object under it. Once you’ve done that, delete the server’s object from AD Sites and Services altogether. After performing these steps, your AD should be clean of any remaining metadata referencing the demoted domain controller.
Now that the metadata is cleaned up, you can go ahead and turn the demoted DC back on, re-join it to the domain, and re-promote it to a DC. Once you’ve done that, you can use repadmin /replsummary and repadmin /showreps to confirm replication to/from it is working again. You can also refresh AD Sites and Services to confirm that the Active Directory KCC is rebuilding replication links to/from the newly-promoted domain controller.
Once you’ve confirmed that replication is working again and that the DC is no longer in USN Rollback, you can go back to having a good day – after, of course, recreating the six user accounts that were created on the affected DC while it was in USN Rollback since those changes were lost when you performed the forced demotion.
Folks, there are a few key takeaways from this scenario:
- Stop sharing your DCs with other services
- VM Snapshots are bad news when it comes to DCs
- ALWAYS record the DSRM password when you promote a DC (even though nobody else does)
This Active Directory administrator’s life became significantly more difficult on a beautiful Friday morning because he failed to follow some simple best practices. Had he (or she) followed basic best practices, this entire exercise would have been reduced to a simple non-authoritative restore of the affected DC that would have required no more than an hour of time. Instead, the process required significantly more effort, lots of hand wringing, and a wasted Saturday.
This has been an Active Directory Public Service Announcement.
Deploying an Auto-Scaling VM Scale Set with a Custom Disk Image
Deploying a VM Scale Set via the Azure portal is straightforward when you are just using a clean, vanilla Windows OS image from the list that Azure provides you. However, what if a scale set that consists of a bunch of vanilla servers doesn’t help? What if I need to host a website on an infrastructure that scales up and down to meet demand?
I spent Sunday morning working on this exact problem.
If I need to deploy a group of IIS virtual machines that not only run the same web app but also scale up and down as demand changes, I am going to want to deploy an auto-scaling Virtual Machine Scale Set (VMSS) that is based on a custom disk image that contains my OS and fully configured web app. Otherwise, how are the additional instances that are automatically spun up going to run my web app?
The process was a bit more challenging than I expected. However, I was able to pull it off with some work.
To accomplish my goal, I had to complete the following tasks:
- Deploy a VM on Managed Disk
- Install IIS on my VM and Configure the Web App
- SysPrep the VM
- Shutdown and Stop the VM
- Capture the VM Disk Image
- Note the Location of the Image
- Build a Scale Set Template (actually borrowed one)
- Add Autoscale Settings to the Scale Set Template
- Ensure the Scale Set Template References the Captured Disk Image as the OS Disk
- Deploy the Scale Set Template
As you can see, there were actually quite a few steps involved to get this right. Unfortunately, it is what it is – you cannot use the Azure Portal alone to deploy an auto-scaling VM Scale Set that’s built on a custom disk image.
The Gold Image
Since I wanted all instances in my scale set to have the same identical configuration, including the web app settings and config, it only made sense that I would start by deploying a virtual machine in Azure, installing IIS on it, and then configuring my web app on it. With that in mind, I deployed a D1_v2 virtual machine with managed disk, installed IIS, and configured my web app.
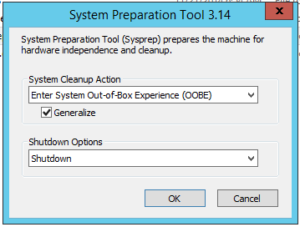 Once I confirmed that my web app was working, I ran SysPrep on the VM, chose OOBE with the “Generalize” option, and told SysPrep to shut the machine down when it was done.
After a few minutes, the machine was SysPrepped and shutdown so went into the Azure portal and stopped it to completely deallocate it.
I then needed to capture an image of my VM’s disk so I could use it as a reference for my scale set instances. To capture an image, I waited for my VM to be completely deallocated in my portal and then simply clicked the “Capture” button in Azure.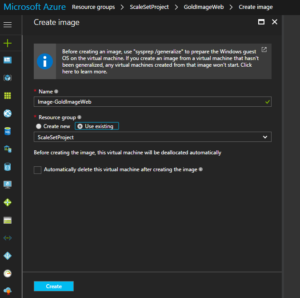
I waited for the capture to complete (about 3 minutes). My captured image would be the “Gold Image” that my scale set instances would use. Once the capture completed, I looked at the properties of the new disk image resource in my portal so I could note the location of the image.
The value under RESOURCE ID is the location of the image that I was interested in so I copied and pasted to a text file for future reference.
With the disk image location on hand; I was able to use an ARM template to deploy my scale set while specifying my custom disk image.
Creating the Scale Set Template
Although I was a coder at one time and know my way around ARM templates a bit, I will be the first to admit that I am not an ARM template expert. Lucky for me, there are scale set ARM templates published all over the internet. All I had to do was pull one down and modify it for my needs.
After pulling down this scale set ARM template, I went ahead and made a few minor modifications:
- Added custom disk reference (see orange code below)
- Added autoscale code (see red code below)
- Changed name reference (just some template cleanup)
- Changed instance values (see blue code below)
The complete template, including the autoscale settings is below:
 {
    "$schema": "http://schema.management.azure.com/schemas/2015-01-01-preview/deploymentTemplate.json",
    "contentVersion": "1.0.0.0",
    "parameters": {
        "vmSku": {
            "defaultValue": "Standard_DS1_V2",
            "type": "String",
            "metadata": {
                "description": "Size of VMs in the VM Scale Set."
            }
        },
        "vmssName": {
            "type": "string",
            "metadata": {
                "description": "Name of the VM scale set."
            }
      },
        "instanceCount": {
            "maxValue": 3,
            "type": "Int",
            "metadata": {
                "description": "Number of VM instances (100 or less)."
            }
        },
        "adminUsername": {
            "type": "String",
            "metadata": {
                "description": "Admin username on all VMs."
            }
        },
        "adminPassword": {
            "type": "SecureString",
            "metadata": {
                "description": "Admin password on all VMs."
            }
        },
        "osType": {
            "allowedValues": [
                "Windows",
                "Linux"
            ],
            "type": "String"
        }
    },
    "variables": {
        "namingInfix": "[toLower(substring(concat(parameters('vmssName'), uniqueString(resourceGroup().id)), 0, 9))]",
        "longNamingInfix": "[toLower(parameters('vmssName'))]",
        "vhdContainerName": "[concat(variables('namingInfix'), 'vhd')]",
        "addressPrefix": "10.0.0.0/16",
        "subnetPrefix": "10.0.0.0/24",
        "virtualNetworkName": "[concat(variables('namingInfix'), 'vnet')]",
        "publicIPAddressName": "[concat(variables('namingInfix'), 'pip')]",
        "subnetName": "[concat(variables('namingInfix'), 'subnet')]",
        "loadBalancerName": "[concat(variables('namingInfix'), 'lb')]",
        "publicIPAddressID": "[resourceId('Microsoft.Network/publicIPAddresses',variables('publicIPAddressName'))]",
        "lbID": "[resourceId('Microsoft.Network/loadBalancers',variables('loadBalancerName'))]",
        "natPoolName": "[concat(variables('namingInfix'), 'natpool')]",
        "bePoolName": "[concat(variables('namingInfix'), 'bepool')]",
        "natStartPort": 50000,
        "natEndPort": 50119,
        "natBackendPort": 22,
        "nicName": "[concat(variables('namingInfix'), 'nic')]",
        "ipConfigName": "[concat(variables('namingInfix'), 'ipconfig')]",
        "frontEndIPConfigID": "[concat(variables('lbID'),'/frontendIPConfigurations/loadBalancerFrontEnd')]",
        "computeApiVersion": "2016-04-30-preview",
        "networkApiVersion": "2016-03-30",
      "insightsApiVersion": "2015-04-01",
      "location": "[resourceGroup().location]"
    },
    "resources": [
        {
            "type": "Microsoft.Network/virtualNetworks",
            "name": "[variables('virtualNetworkName')]",
            "apiVersion": "[variables('networkApiVersion')]",
            "location": "[resourceGroup().location]",
            "properties": {
                "addressSpace": {
                    "addressPrefixes": [
                        "[variables('addressPrefix')]"
                    ]
                },
                "subnets": [
                    {
                        "name": "[variables('subnetName')]",
                        "properties": {
                            "addressPrefix": "[variables('subnetPrefix')]"
                        }
                    }
                ]
            }
        },
        {
            "type": "Microsoft.Network/publicIPAddresses",
            "name": "[variables('publicIPAddressName')]",
            "apiVersion": "[variables('networkApiVersion')]",
            "location": "[resourceGroup().location]",
            "properties": {
                "publicIPAllocationMethod": "Dynamic",
                "dnsSettings": {
                    "domainNameLabel": "[variables('longNamingInfix')]"
                }
            }
        },
        {
            "type": "Microsoft.Network/loadBalancers",
            "name": "[variables('loadBalancerName')]",
            "apiVersion": "[variables('networkApiVersion')]",
            "location": "[resourceGroup().location]",
            "properties": {
                "frontendIPConfigurations": [
                    {
                        "name": "LoadBalancerFrontEnd",
                        "properties": {
                            "publicIPAddress": {
                                "id": "[variables('publicIPAddressID')]"
                            }
                        }
                    }
                ],
                "backendAddressPools": [
                    {
                        "name": "[variables('bePoolName')]"
                    }
                ],
                "inboundNatPools": [
                    {
                        "name": "[variables('natPoolName')]",
                        "properties": {
                            "frontendIPConfiguration": {
                                "id": "[variables('frontEndIPConfigID')]"
                            },
                            "protocol": "tcp",
                            "frontendPortRangeStart": "[variables('natStartPort')]",
                            "frontendPortRangeEnd": "[variables('natEndPort')]",
                            "backendPort": "[variables('natBackendPort')]"
                        }
                    }
                ]
            },
            "dependsOn": [
                "[concat('Microsoft.Network/publicIPAddresses/', variables('publicIPAddressName'))]"
            ]
        },
        {
            "type": "Microsoft.Compute/virtualMachineScaleSets",
            "sku": {
                "name": "[parameters('vmSku')]",
                "tier": "Standard",
                "capacity": "[parameters('instanceCount')]"
            },
            "name": "[parameters('vmssName')]",
            "apiVersion": "[variables('computeApiVersion')]",
            "location": "[resourceGroup().location]",
            "properties": {
                "overprovision": "true",
                "upgradePolicy": {
                    "mode": "Manual"
                },
                "virtualMachineProfile": {
                    "storageProfile": {
                        "imageReference": {
                            "id": "/subscriptions/9cbf5438-a4a1-4227-8a0d-18e92fe2e472/resourceGroups/vmssdemo/providers/Microsoft.Compute/images/GoldImage"
                        }
                    },
                    "osProfile": {
                        "computerNamePrefix": "[variables('namingInfix')]",
                        "adminUsername": "[parameters('adminUsername')]",
                        "adminPassword": "[parameters('adminPassword')]"
                    },
                    "networkProfile": {
                        "networkInterfaceConfigurations": [
                            {
                                "name": "[variables('nicName')]",
                                "properties": {
                                    "primary": "true",
                                    "ipConfigurations": [
                                        {
                                            "name": "[variables('ipConfigName')]",
                                            "properties": {
                                                "subnet": {
                                                    "id": "[concat('/subscriptions/', subscription().subscriptionId,'/resourceGroups/', resourceGroup().name, '/providers/Microsoft.Network/virtualNetworks/', variables('virtualNetworkName'), '/subnets/', variables('subnetName'))]"
                                                },
                                                "loadBalancerBackendAddressPools": [
                                                    {
                                                        "id": "[concat('/subscriptions/', subscription().subscriptionId,'/resourceGroups/', resourceGroup().name, '/providers/Microsoft.Network/loadBalancers/', variables('loadBalancerName'), '/backendAddressPools/', variables('bePoolName'))]"
                                                    }
                                                ],
                                                "loadBalancerInboundNatPools": [
                                                    {
                                                        "id": "[concat('/subscriptions/', subscription().subscriptionId,'/resourceGroups/', resourceGroup().name, '/providers/Microsoft.Network/loadBalancers/', variables('loadBalancerName'), '/inboundNatPools/', variables('natPoolName'))]"
                                                    }
                                                ]
                                            }
                                        }
                                    ]
                                }
                            }
                        ]
                    }
                }
            },
            "dependsOn": [
                "[concat('Microsoft.Network/loadBalancers/', variables('loadBalancerName'))]",
                "[concat('Microsoft.Network/virtualNetworks/', variables('virtualNetworkName'))]"
            ]
        },
{
  "type": "Microsoft.Insights/autoscaleSettings",
      "apiVersion": "[variables('insightsApiVersion')]",
      "name": "autoscalehosts",
      "location": "[variables('location')]",
      "dependsOn": [
        "[concat('Microsoft.Compute/virtualMachineScaleSets/', parameters('vmssName'))]"
      ],
  "properties": {
    "enabled": true,
    "name": "autoscalehosts",
    "profiles": [
      {
        "name": "Profile1",
        "capacity": {
          "minimum": "1",
          "maximum": "3",
          "default": "1"
        },
        "rules": [
          {
            "metricTrigger": {
              "metricName": "Percentage CPU",
                  "metricNamespace": "",
                  "metricResourceUri": "[concat('/subscriptions/',subscription().subscriptionId, '/resourceGroups/',  resourceGroup().name, '/providers/Microsoft.Compute/virtualMachineScaleSets/', parameters('vmSSName'))]",
                  "timeGrain": "PT1M",
                  "statistic": "Average",
                  "timeWindow": "PT5M",
                  "timeAggregation": "Average",
                  "operator": "GreaterThan",
                  "threshold": 60.0
            },
            "scaleAction": {
              "direction": "Increase",
                  "type": "ChangeCount",
                  "value": "1",
                  "cooldown": "PT1M"
            }
          },
          {
            "metricTrigger": {
               "metricName": "Percentage CPU",
                  "metricNamespace": "",
                  "metricResourceUri": "[concat('/subscriptions/',subscription().subscriptionId, '/resourceGroups/',  resourceGroup().name, '/providers/Microsoft.Compute/virtualMachineScaleSets/', parameters('vmSSName'))]",
                  "timeGrain": "PT1M",
                  "statistic": "Average",
                  "timeWindow": "PT5M",
                  "timeAggregation": "Average",
                  "operator": "LessThan",
                  "threshold": 30.0
            },
            "scaleAction": {
              "direction": "Decrease",
                  "type": "ChangeCount",
                  "value": "1",
                  "cooldown": "PT1M"
            }
          }
        ]
      }
    ],
    "targetResourceUri": "[concat('/subscriptions/', subscription().subscriptionId, '/resourceGroups/', resourceGroup().name, '/providers/Microsoft.Compute/virtualMachineScaleSets/', parameters('vmSSName'))]"
  }
}
    ]
}
An in-depth explanation of the architecture of this template file will require an entire post all by itself so I am not going to break down the template here. That said, keep an eye out for a future post, where I will break everything down.
What Does the Template Do?
In its current state, the template (as written) limits the initial scale set deployment to a maximum of 3 instances. It also deploys the required load balancer for the scale set, along with the network and subnet values specified in the template (10.0.0.0/16 and 10.0.0.0/24).
The template configures the scale set to autoscale based on CPU utilization. At 60% utilization over 5 minutes, it will scale up by one instance. At 30% utilization, it will scale down by one instance.
Deploying the Template
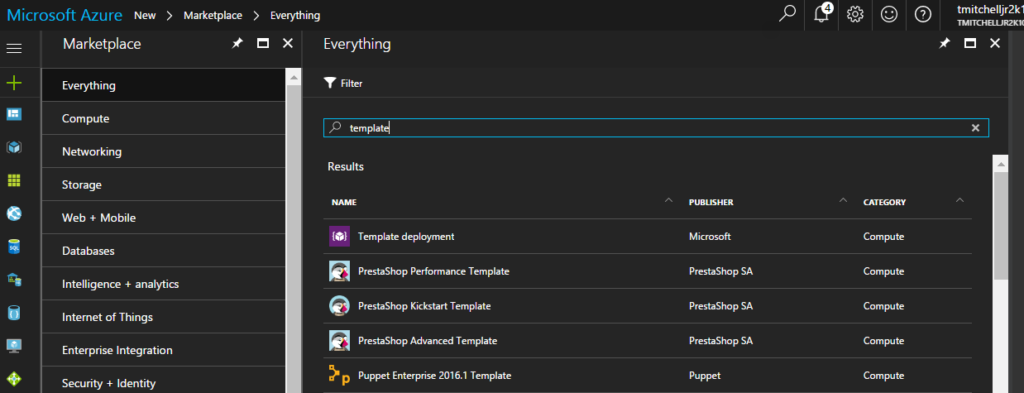
Deploying the scale set using the template isn’t terribly difficult. To deploy it, browse the marketplace in the portal and search for “template deployment” and click on it in the list.
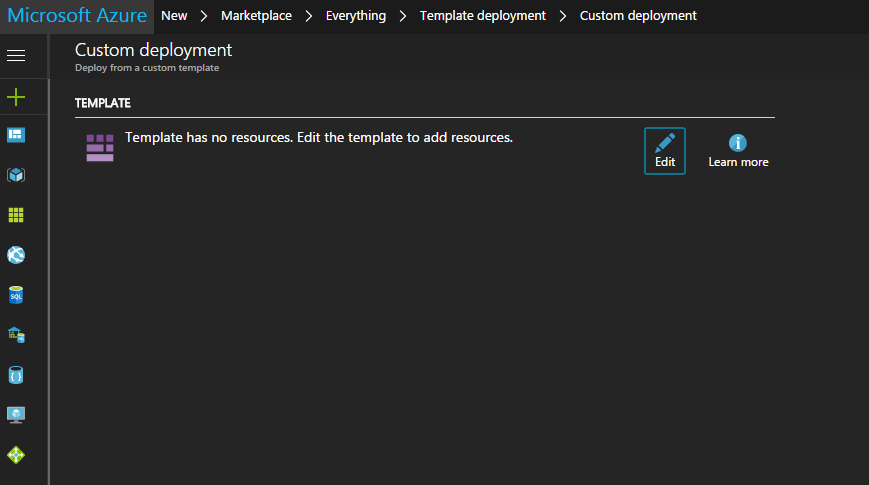
After clicking on the “Template Deployment” resource, click the blue “Create” button. You’ll then be offered the opportunity to upload the template.
Click the “Edit” button, then “Load File”, and then browse to your saved template file. The screen will change, displaying the content of your template:
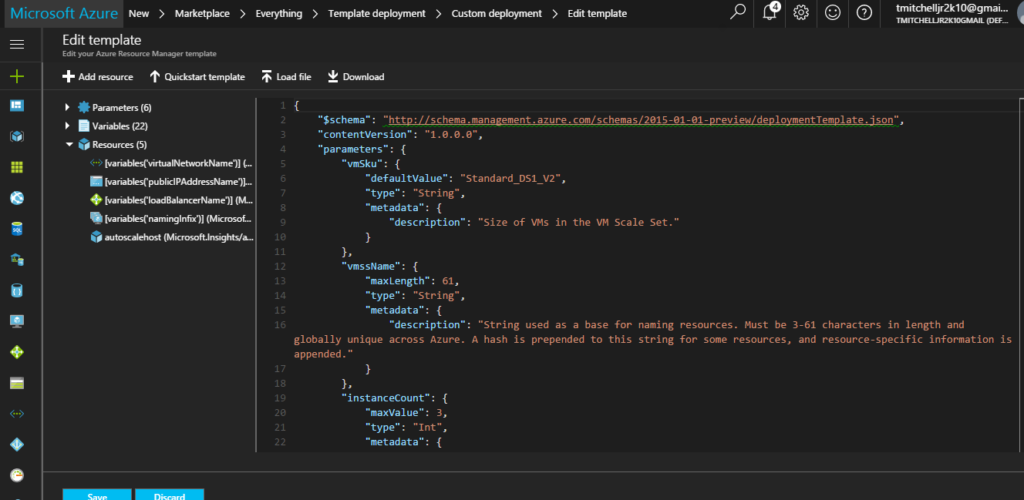
With your template loaded, click “Save”.
You will be prompted for information about your scale set. Provide the following information:
- Resource Group (I usually create a new one so everything is in one place)
- VMSS Name (name of your scale set)
- Instance Count (number of instances to deploy)
- Admin Username (admin username for all instances)
- Admin Password (admin password for all instances)
- OS Type (what type of OS you are deploying)
After supplying the information for your new scale set, check the box to agree to terms and conditions and then click “Purchase”. The template is validated and the deployment begins.
Deployment takes maybe 10-15 minutes or so.
When complete, you will have an auto-scaling VM Scale Set that is based on a managed custom disk image. All instances that are spun up will contain your applications and your OS just as they were configured on your “Gold Image”.
Your Turn…
So, now it’s your turn. If you want to deploy a scale set based on a custom disk image, you will want to deploy a virtual machine through the portal before you do anything else. I typically use the D1_V2 size. Once you have the virtual machine deployed and OS configured, install and configure your applications on the server. You will obviously have to RDP into it to do this.
After ensuring your applications work correctly, perform a SysPrep on the server by browsing to Windows\System32\Sysprep and running the sysprep.exe app. When running SysPrep, you should choose the OOBE option, ensure the “Generalize” box is checked, and select the option to shut down after SysPrep is done. When SysPrep is complete, the virtual machine will shut down. Before going onto the next step, go into your Azure portal and “Stop” the virtual machine from the Overview blade of your VM.
With the virtual machine stopped, click the “Capture” icon. After a few minutes, you will have a “disk image” resource in your resource group in Azure. To get the location of the image, click on the image resource and note the value in the RESOURCE ID value.
After noting the disk image location, copy the template code from earlier in this article and save it as “template.json”. Make sure you do not save it as a text file.
Once you have the file saved, go to the orange code in the file and replace it with the value from your RESOURCE ID box. With the disk image location modified, there are no other required changes to the template file. You can save your file and deploy it. Go back to the Deploying the Template section of this article for the steps involved in deployment.
How Do I Know It Worked?
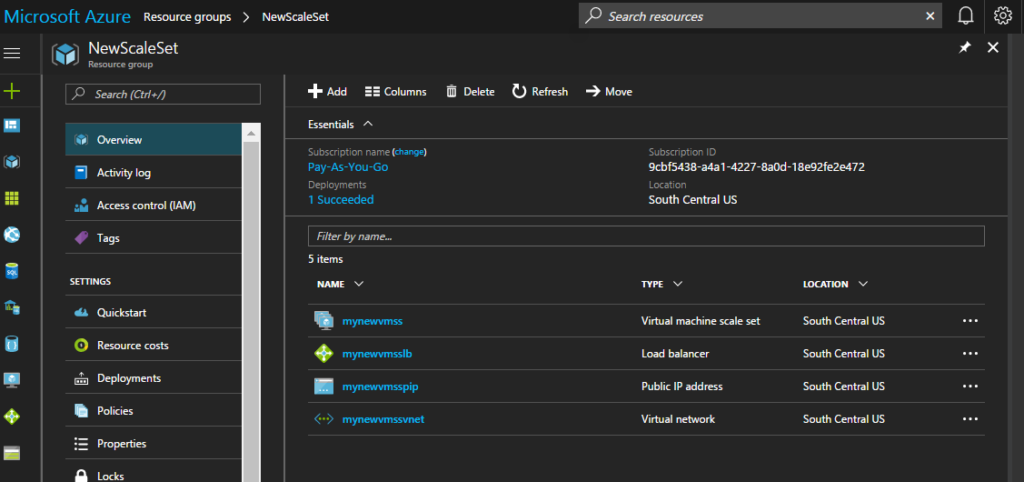
Browse to your Resource Group in your portal and click “Overview”. You should see the following resources running in the right pane:
- Virtual Machine Scale Set
- Load Balancer
- Public IP Address
- Virtual Network
The names of your resources will be based on what name you gave your Scale Set when you deployed it.
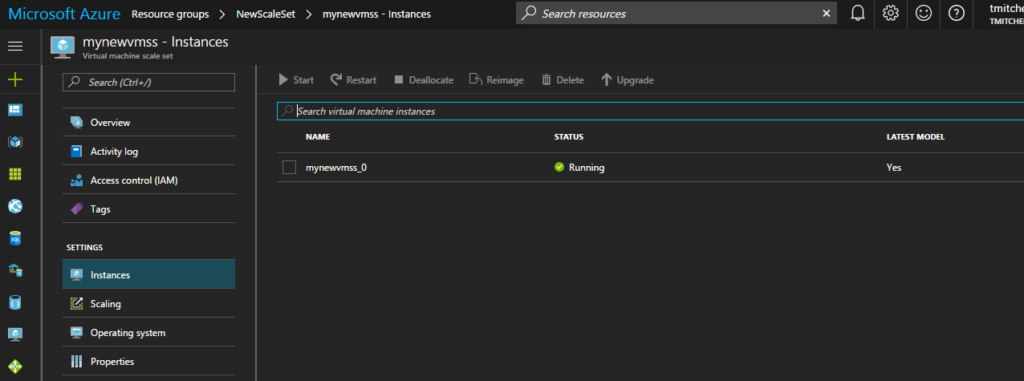
If you click on the scale set, and then “Instances” under “Settings”, you will see how many instances are running.
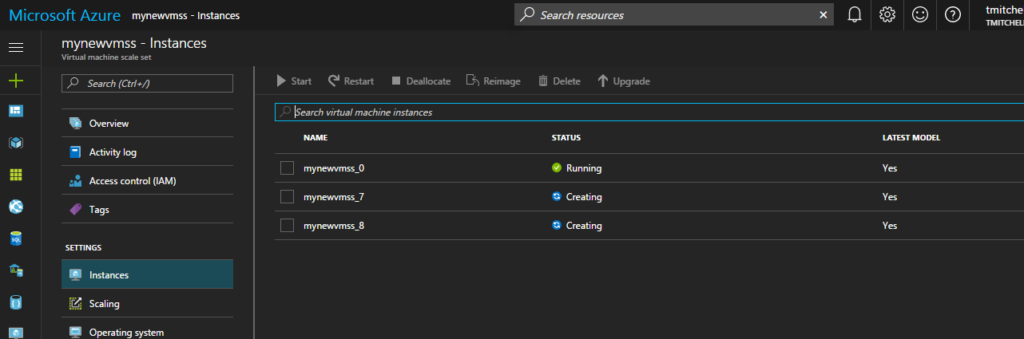
A cool test to run is to download LoadSim to your instance and jack up the CPU cycles. As the CPU utilization rises, you will see Azure automatically deploy additional instances as part of the scale set. You can download the LoadSim here.
But How to I Connect?
Did you notice that there is no “Connect” option that allows you to RDP into your instances? That is “as-designed” in order to reduce costs and complexity of the need for a public IP for every instance that is spun up. However, what you CAN do is spin up a “jump box” (another VM in Azure) and RDP to your instances from it.
The IP addresses for your instances can be found by clicking on the Load Balancer resource and then “Backend Pools”. Azure will display the instances on the backend, along with their private IP addresses.

Simply RDP to the IP address of the instance and install the load simulator. Mess around with the settings and watch as the scale set adds and removes instances based on load.
Wrap Up
If you ask me, the process of creating a scale set based on a custom image is a bit more tedious than it really needs to be. I suspect that, at some point, the functionality will be added to the portal. However, until then, we are left with PowerShell and ARM Templates as our options.
With that said, it never hurts to know your way around PowerShell and templates anyway so get to it. Go deploy your own autoscaling VM scale set using a template and add another skillset to your Azure arsenal!