How to Deploy a Virtual Machine in Azure with PowerShell
Introduction
I’m a GUI guy. When offered the choice between using a GUI to perform a task and using PowerShell, I will almost always choose the GUI. However, that does not mean I won’t or can’t use PowerShell. In fact, any Microsoft engineer worth anything should be familiar with using PowerShell. As such, I’m going to explain to you in this article how to use PowerShell to configure and deploy several Azure resources, including a Resource Group, a Storage Account, a Virtual Network, a Subnet, a Public IP address, a Network Interface, and last, but not least, a Virtual Machine.
Install Azure PowerShell
Before doing anything in Azure with PowerShell, you are going to have to install Azure PowerShell. To do so, visit this link and click on Windows Install under the PowerShell section.
Connect to Azure with PowerShell
Once you’ve installed Azure PowerShell, go ahead and launch PowerShell from your workstation:
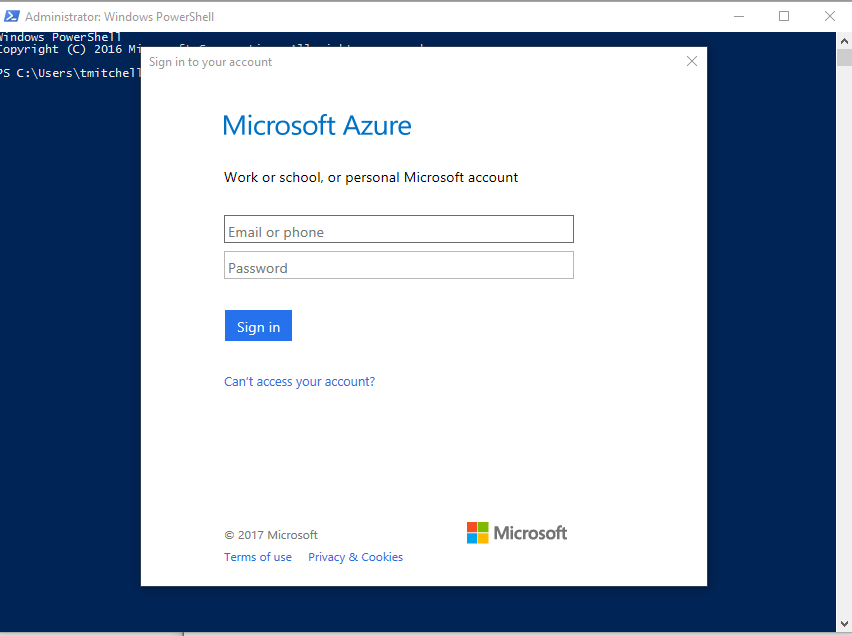
After launching PowerShell, go ahead, type Login-AzureRmAccount, and hit Enter. When prompted for your Azure credentials supply them and click Sign In.
Once you’ve signed in, it’s time to create your resource group, which will contain all of the resources you are about to create.
Create a resource group
Before you create your resource group, you need to decide where you are going to create it and what you are going to name it. To get a list of available locations where resources can be created, type the following command in PowerShell and hit Enter:
Get-AzureRmLocation | sort Location | Select Location
After hitting Enter, you will be provided with a number of Locations to choose from.
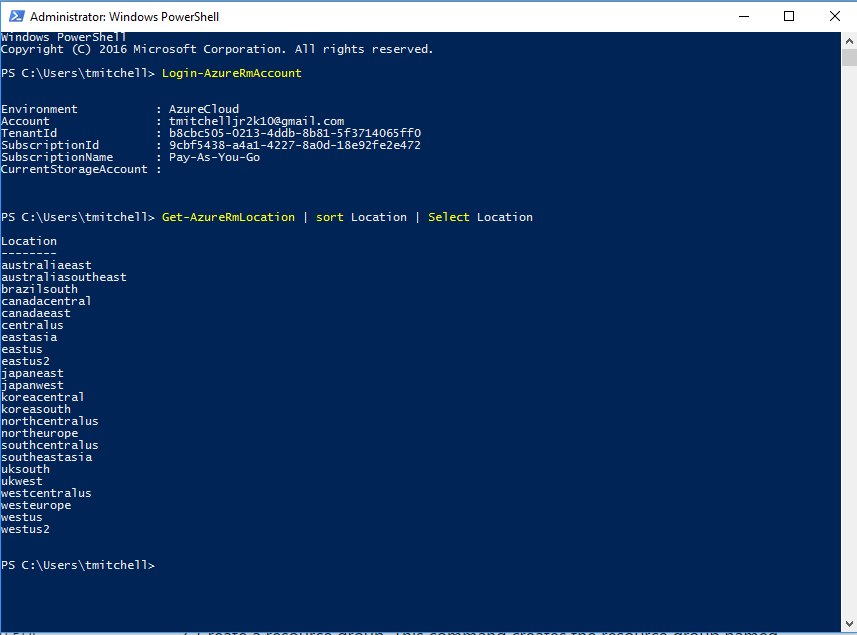
For this exercise, note the location westus as your chosen location and let’s call the resource group myAzureResourceGroup.
Now that you’ve settled on a location and name for your resource group, type the following three commands in PowerShell, hitting Enter after each one:
$location = "westus"
$myResourceGroup = "myAzureResourceGroup"
New-AzureRmResourceGroup -Name $myResourceGroup -Location $location

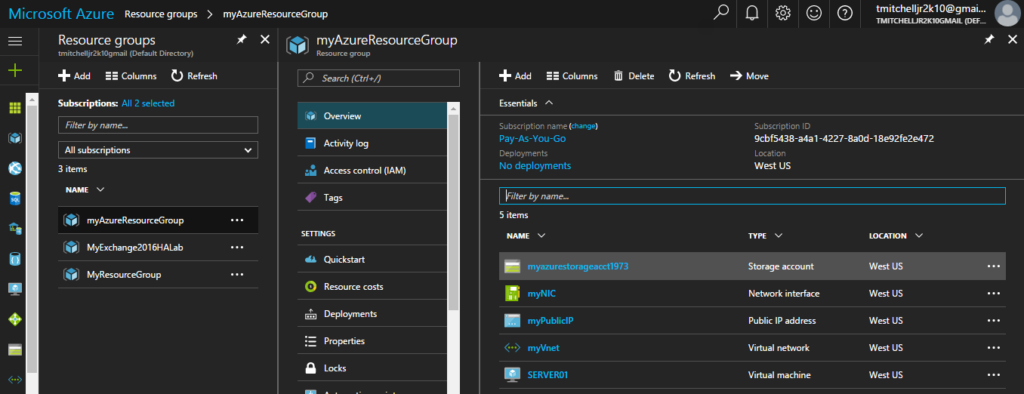
At this point, your Resource Group named myAzureResourceGroup has been provisioned in the West US location. With your resource group deployed, it’s time to create a storage account to hold your storage for your VM.
Create Storage Account
Before creating your storage account, you have to settle on a name that is unique across the entire Azure landscape. The name of your storage account must be between 3 and 24 characters and must consist only of lower case letters and numbers.
For this exercise, we will call the storage account myazurestorageacct1973.
To check the availability of the name, type the following two commands in PowerShell, hitting Enter after each one:
$myStorageAccountName = " myazurestorageacct1973"
Get-AzureRmStorageAccountNameAvailability $myStorageAccountName
If the second command returns True, the proposed name is unique within Azure and can be used.

To deploy the storage account, type the following command and hit Enter:
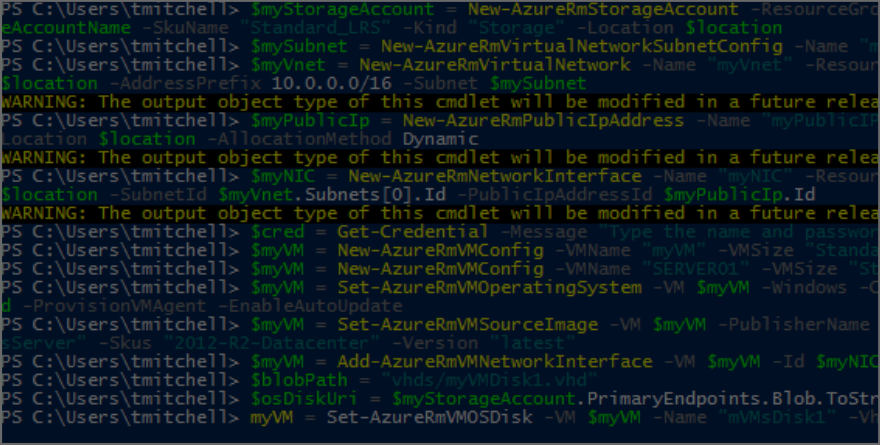
$myStorageAccount = New-AzureRmStorageAccount -ResourceGroupName $myResourceGroup -Name $myStorageAccountName -SkuName "Standard_LRS" -Kind "Storage" -Location $location
NOTE: The above command is one long line.
If everything goes as it should, you should just be taken back to the prompt in PowerShell:

Create a virtual network
Now that the resource group and storage account have been deployed, go ahead and create the virtual network that your eventual virtual machine will live on. To do this, you will have to deploy two resources: subnet and virtual network.
For this exercise, we will deploy a subnet called mySubnet with an address prefix of 10.0.0.0/24 on a 10.0.0.0/16 virtual network called myVnet.
Deploy the subnet first by running the following command in PowerShell and hitting Enter:
$mySubnet = New-AzureRmVirtualNetworkSubnetConfig -Name "mySubnet" -AddressPrefix 10.0.0.0/24
After running the command, you will be take back to the prompt.
With the subnet created, go ahead and deploy the virtual network by running the following command and hitting Enter:
$myVnet = New-AzureRmVirtualNetwork -Name "myVnet" -ResourceGroupName $myResourceGroup -Location $location -AddressPrefix 10.0.0.0/16 -Subnet $mySubnet
As was the case before, the above command is one long string. If run successfully, you will simply be taken back to the prompt in PowerShell.
By now, you’ve deployed your resource group, storage account, and virtual network with a subnet attached to it. It is now time to create a public IP address and network interface. The network interface will allow your virtual machine to connect to your virtual network while your public IP address will allow you to RDP into your virtual machine once it has been deployed.
Create a public IP address and network interface
Before provisioning your network interface, you will want to provision your public IP address. To do so, run the following command in PowerShell and hit Enter:
$myPublicIp = New-AzureRmPublicIpAddress -Name "myPublicIP" -ResourceGroupName $myResourceGroup -Location $location -AllocationMethod Dynamic
The command above is all one line and the result of it is a dynamic public IP address resource called myPublicIP. You will assign this public IP while provision your virtual network interface (named myNIC) by running the command below and hitting Enter:
$myNIC = New-AzureRmNetworkInterface -Name "myNIC" -ResourceGroupName $myResourceGroup -Location $location -SubnetId $myVnet.Subnets[0].Id -PublicIpAddressId $myPublicIp.Id
At this point, you’ve got the infrastructure prepared and you can now deploy the virtual machine.
Create a virtual machine
Virtual machines can be deployed using both sysprepped and non-sysprepped images. They can also be deployed from the Marketplace, which is what we are going to do here.
The first thing you’ll want to do is set the admin account and password for your virtual machine. To do this, run the command below and hit Enter:
$cred = Get-Credential -Message "Type the name and password of the local administrator account."
When prompted, supply an administrative username and password. The password must be at least 12 characters long and contain one upper case character, one lower case character, a number, and one special character.
Next, you’ll need to create a configuration object for the virtual machine. The configuration object includes a name for the virtual machine and a size for the virtual machine. For this exercise, we’ll name our virtual machine SERVER01 and use the “Standard_DS1_v2” size.
To complete this task, run the following command and hit Enter:
$myVM = New-AzureRmVMConfig -VMName "SERVER01" -VMSize "Standard_DS1_v2"
Click here for a list of supported server sizes in Azure.
Once you’ve completed the above task, you’ll need to configure the operating system for the virtual machine. This configuration task sets the computer name, OS type, and account credentials for the VM. To configure these settings run the following command from PowerShell:
$myVM = Set-AzureRmVMOperatingSystem -VM $myVM -Windows -ComputerName "SERVER01" -Credential $cred -ProvisionVMAgent –EnableAutoUpdate
Be sure to run the above command all on one line (no line breaks). As is the case with other commands, you’ll simply be returned to the prompt when it completes.
At this point, you can define the image you’d like to use to provision the virtual machine. Run the following command to deploy a Windows 2012 R2 Datacenter machine:
$myVM = Set-AzureRmVMSourceImage -VM $myVM -PublisherName "MicrosoftWindowsServer" -Offer "WindowsServer" -Skus "2012-R2-Datacenter" -Version "latest"
Now that the image is selected, go ahead and add the network interface that you provisioned earlier:
$myVM = Add-AzureRmVMNetworkInterface -VM $myVM -Id $myNIC.Id
Once you have the network interface added to your virtual machine, you can define the name and location of the hard disk for the VM. For this exercise, we will call our disk myVMDisk1.vhd.
To complete this task, run the following two commands, hitting Enter after each one:
$blobPath = "vhds/myVMDisk1.vhd"
$osDiskUri = $myStorageAccount.PrimaryEndpoints.Blob.ToString() + $blobPath
With the disk name and location defined, you can add the disk to your virtual machine configuration. The following command (all one line) will create a disk called myVMDisk1:
$myVM = Set-AzureRmVMOSDisk -VM $myVM -Name "mVMsDisk1" -VhdUri $osDiskUri -CreateOption fromImage
You can now create the actual virtual machine using the following command:
New-AzureRmVM -ResourceGroupName $myResourceGroup -Location $location -VM $myVM
To confirm creating of your new virtual machine, login to your Azure Portal and ensure it is listed under your resource group called myAzureResourceGroup.
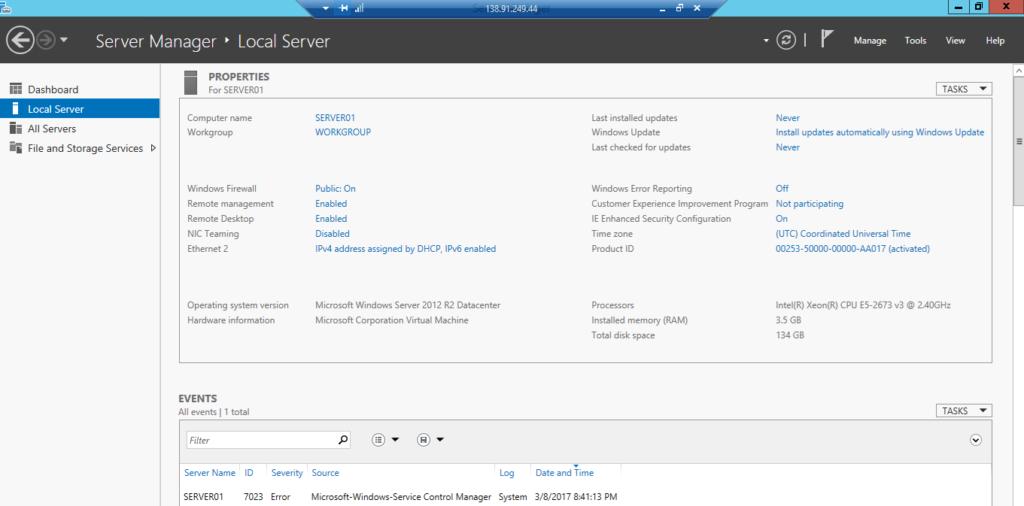
You should also be able to connect to it via RDP.
Thomas Mitchell administrator
Who is Tom Mitchell and what does he know about IT? Tom is a 20+ year veteran if the IT industry. His broad skillset features expert-level knowledge of technologies such as Active Directory, Microsoft Exchange, Office 365, and Microsoft Azure. Tom's skillset also includes other diciplines such as VMWare, Storage, PKI, and more. Tom holds the coveted MCSE: Cloud Platform & Infrastructure certification, along with a few MCSA certifications and numerous other certifications - including the VMWare VCP certification. With extensive planning, design, implementation, and support experience, there is very little that Tom cannot handle.
About the author